SDR - srsLTE Build Process Home : www.sharetechnote.com
srsLTE - Build and Test
In this page I will show you how to build srsLTE/srsGUI based on my experience. The exact process might vary a little bit depending on what kind of Linux varient you are using and what kind of libraries/tools you already installed in your PC.
To be honest, I am at the very beginner's level for Linux. One of the biggest reason why I haven't used Linux much was mainly from my personal experience several years ago when I first tried. At that time, almost nothing was plug & play, no installation package could be done just by a mouse click as in Windows and compile/build process was really like pulling teeth :).
Recently I noticed that Linux has been improved drastically in terms of installation and hardware configuration. In case of many application packages, I found installation is even easier than Windows application... just typing in 'sudo apt-get install xxxx'.. that's it.
However, there are still some applications that requires many human intervention.. sometimes you need to build the source code of the application and requires a lot of try-and-errors. Unfortunately a lot of opensource type of packages are like this.. In some way, it is understandable because those opensource tools keep revising and it would cost a lot to make a stable/reliable installation package.
In some way, it would be a good practice / self training of Linux to install and build this kind of tool from scratch. At least, it was very good experience / training to me to go through all of these process. and I decided to share my experience for those who are almost same level as I in Linux world.
One very good thing about srsLTE is that I can run the exactly same code with or without the hardware (e.g, USRP etc) just by chaning a small flag. My personal interest for now is to dig further into physical layer issues and not much of interest in higher layer. You may learn a lot of details about higher layers just by reading the specification and analyzing UE log or eNB/Network log. However, based on my personal experience it is almost impossible to understand the details of Physical layer issue (Low Phy issues) without coding on your own (at least some of the practice of braking & fixing the code). This is strong enough motivation to push myself to overcome my Linux-phobia :).
Installation Environment
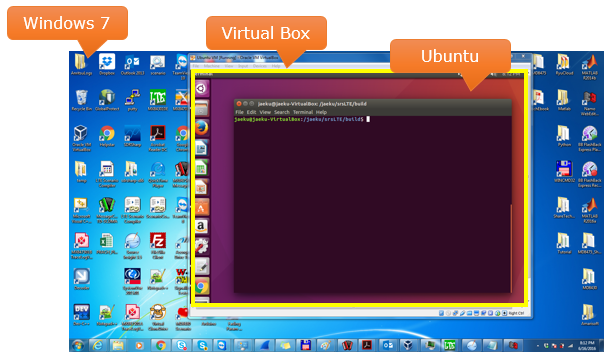
Following is the environment where I tried building srsLTE. Instead of using a separate Linux PC, I used my Windows PC and created a virtual environement for a Linux (Ubuntu) as illustrated below. To be honest, I am still not confident enough to fully dedicate to Linux.
This might not be a good environment to implement a SDR with real hardware, this kind of virtual environment might not be sufficient in terms of performance unless you are using a super high performance PC. But my intention for now is just to setup an environment where I can build the code and run some of the sample code which does not require hardware. Eventually I will try with real hardware in the future once I become fully confident, but for now this virtual environment would be good enough for me and I think there are many people out there who has similar intention as mine and I hope this help those people as well.
In short, the final goal is to build (install) srsLTE, but there are many dependencies to be installed before you try building srsLTE. Followings are the list of tools/packages/libraries you need to install to make srsLTE work. According to the srsLTE official instruction, it says the only mandatory dependency is FFTW, but based on my experience it was not possible to build srsLTE if any of the followings are missing.
Before you start this project, check if you have all the tools listed here. They would help you at various points of the process.
i) Install git (if you don't have it) using following command
# sudo apt-get install git
ii) Install apt-file (if you don't have it) using following command
# sudo apt install apt-file
iii) Install Synaptic Package Manager using the following command (if you don't have it)
# sudo apt-get install synaptic
iv) install cmake using the following command (if you don't have it)
# sudo apt-get install cmake
First thing you have to install is FFTW. If you google the tool or go to offical FFTW site, you would get a lot of information, but it was hard to find any simple instruction for installation. Fortunately I found following command and it worked in my Ubuntu.
# sudo apt-get install fftw3 fftw3-dev pkg-config
2. Python and Cheetah installation
I've never expected that I need python and Cheetah to build SDR solution. It might not directly required for srsLTE itself but I needed to install this while I was installing some other tools that is required for srsLTE build.
Following command is to install python-cheetah
# sudo apt install python-cheetah
Following is a kind of test after the installation. It might not be mandatory to try this.. but would not do any harm if you do
# cheetah test
3. Boost / QT4 / Qwt6 Installation
If you want to go with the simplest way of installation, just try following as instructed in srsGUI git page.
# sudo apt-get install libboost-system-dev libboost-test-dev libboost-thread-dev libqwt-dev libqt4-dev
However, if you want to try a little bit complicated way (I don't know why, but I tried this in my first installation. But it was good practice to try various way of installation method)
I noticed that some of the packge requires Boost library Installation. In my case, following two commands installed all that are required.
# sudo apt-get install boost
# sudo apt-get install libboost-all-dev
Next step is to install Qt4. It seems that this is required too for srsGUI. Note that you need to install Qt4.x, not Qt5 or higher. At first, I installed Qt5 which seems to be the latest version as of now (Jun 2016), but srsGUI was still complaining and looking for Qt4.x. You may find some instruction to install this using 'apt-get' from srsGUI git page. But I used Synaptic Package Manager to install.

VOLK stands for Vector-Optimized Library of Kernel and you can get all the details information from the official site. For the biginner, this step would be challenging because this is not a simple installation. You have to download and build the code. In my Ubuntu, following procedure worked (Refer to https://github.com/gnuradio/volk for download / build / install instruction.)
First, download the code using following command
# git clone https://github.com/gnuradio/volk.git
Then you can build the code by running a sequence log command as listed below
# cd volks
# mkdir build
# cd build
# cmake ..
# make
# make test
# sudo make install
Unfortunately I failed to install this package. I think this is because I am using Ubuntu 16.04 and the package for this versions of Ubuntu is not released yet. However, if you need only srsLTE, srsGUI you don't need to worry about it. This is required only for srsUE.
However, if you are using other Linux variants or a little bit older version of Ubuntu, you may try this
# sudo apt-get install libpolarssl-dev
UHD stands for USRP Hardware Driver. At first, I tried to compile srsLTE without installing this driver because I was not going to use USRP and just wanted to run some sample code that would not use the hardware. However, I kept getting cmake error from srsLTE if I try to build without this drive. If you go to UHD offical page, you would get the driver and installation instruction. In my case, I ran the three commands under Ubuntu section as below.
# sudo add-apt-repository ppa:ettusresearch/uhd
# sudo apt-get update
# sudo apt-get install libuhd-dev libuhd003 uhd-host
You can download and get installation documents from srsGUI git home. Simply put, just run all the following commands in sequence. (Note : Don't forget the last step. If you skip the last step, you will get a complain when you are building srsLTE)
# git clone https://github.com/suttonpd/srsgui.git
# cd srsgui
# mkdir build
# cd build
# cmake ../
# make
# sudo make install
Now we are at the last step, that is, install srsLTE. You can download and get installation documents from srsLTE git home. Simply put, just run all the following commands in sequence. If you skip the last step, you will get a complain when you are building srsUE)
# git clone https://github.com/srsLTE/srsLTE.git
# cd srsLTE
# mkdir build
# cd build
# cmake ../
# make
# sudo make install
Now it is about time to check whether you went through all of those steps properly. I came a long way to see this :)
I will show you an example on how to run an example program created by the build process without using RF hardware.
Once you are done with this, you can freely modify the source code as you like and rebuid, run again and see how it goes.. (srsLTE API Document would be helpful for you to understand the source code)
First, go to the example directory of the srsbuild output, try 'ls' and see what kind of files are there. Following is what I get.
# ~/srsLTE/build/srslte/examples$ ls -al
total 4924
drwxrwxr-x 4 root root 4096 Jun 19 11:55 .
drwxrwxr-x 6 root root 4096 Jun 18 02:40 ..
-rwxrwxr-x 1 root root 62248 Jun 18 02:41 cell_measurement
-rwxrwxr-x 1 root root 43024 Jun 18 02:41 cell_search
drwxrwxr-x 10 root root 4096 Jun 18 02:40 CMakeFiles
-rw-rw-r-- 1 root root 1185 Jun 18 02:40 cmake_install.cmake
-rw-rw-r-- 1 root root 314 Jun 18 02:40 CTestTestfile.cmake
-rw-rw-r-- 1 root root 19548 Jun 18 02:40 Makefile
-rwxrwxr-x 1 root root 69168 Jun 18 02:41 pdsch_enodeb
-rwxrwxr-x 1 root root 64168 Jun 18 02:41 pdsch_ue
-rwxrwxr-x 1 root root 36112 Jun 18 02:41 synch_file
drwxrwxr-x 3 root root 4096 Jun 18 02:40 tutorial_examples
-rwxrwxr-x 1 root root 27552 Jun 18 02:41 usrp_capture
-rwxrwxr-x 1 root root 38792 Jun 18 02:41 usrp_capture_sync
-rwxrwxr-x 1 root root 33344 Jun 18 02:41 usrp_txrx
pdsch_enodeb and pdsch_ue are the ones that I will use in this test. As you can easily guess, pdsch_enodeb is the one that can generate frames filled with PDSCH and pdsch_ue is the one that can analyze the downlink frame. You need to understand some option flags in order to run these executables.
First, try to get some help about the option flags.
# ~/srsLTE/build/srslte/examples$ ./pdsch_enodeb -h
linux; GNU C++ version 5.3.1 20160413; Boost_105800; UHD_003.009.004-release
./pdsch_enodeb: invalid option -- 'h'
Usage: ./pdsch_enodeb [agmfoncvpu]
-a RF args [Default ]
-l RF amplitude [Default 0.80]
-g RF TX gain [Default 70.00 dB]
-f RF TX frequency [Default 2400.0 MHz]
-o output_file [Default use RF board]
-m MCS index [Default 1]
-n number of frames [Default -1]
-c cell id [Default 0]
-p nof_prb [Default 25]
-u listen TCP port for input data (-1 is random) [Default -1]
-v [set srslte_verbose to debug, default none]
# ~/srsLTE/build/srslte/examples$ ./pdsch_ue -h
linux; GNU C++ version 5.3.1 20160413; Boost_105800; UHD_003.009.004-release
./pdsch_ue: invalid option -- 'h'
Usage: ./pdsch_ue [agpPoOcildDnruv] -f rx_frequency (in Hz) | -i input_file
-a RF args [Default ]
-g RF fix RX gain [Default AGC]
-i input_file [Default use RF board]
-o offset frequency correction (in Hz) for input file [Default 0.0 Hz]
-O offset samples for input file [Default 0]
-p nof_prb for input file [Default 25]
-P nof_ports for input file [Default 1]
-c cell_id for input file [Default 0]
-r RNTI in Hex [Default 0xffff]
-l Force N_id_2 [Default best]
-C Disable CFO correction [Default Enabled]
-t Add time offset [Default 0]
plots are disabled. Graphics library not available
-n nof_subframes [Default -1]
-s remote UDP port to send input signal (-1 does nothing with it) [Default -1]
-S remote UDP address to send input signal [Default 127.0.0.1]
-u remote TCP port to send data (-1 does nothing with it) [Default -1]
-U remote TCP address to send data [Default 127.0.0.1]
-v [set srslte_verbose to debug, default none]
Now let's generate a downlink frames as below. You can put the option values as you like. With the following command, a downlink frame with the length of 10 radio frames (100 subframes) and MCS = 9
# ~/srsLTE/build/srslte/examples$ ./pdsch_enodeb -o "pdsch.out" -n 10 -m 9
linux; GNU C++ version 5.3.1 20160413; Boost_105800; UHD_003.009.004-release
- Resource Allocation Type: Type 0
+ Resource Block Group Size: 2
+ RBG Bitmap: 0x1fff
- Modulation and coding scheme index: 9
- HARQ process: 0
- New data indicator: No
- Redundancy version: 0
- TPC command for PUCCH: --
- PRB Bitmap Assignment 0st slot:
0, 1, 2, 3, 4, 5, 6, 7, 8, 9, 10, 11, 12, 13, 14, 15, 16, 17, 18, 19, 20, 21, 22, 23, 24,
- PRB Bitmap Assignment 1st slot:
0, 1, 2, 3, 4, 5, 6, 7, 8, 9, 10, 11, 12, 13, 14, 15, 16, 17, 18, 19, 20, 21, 22, 23, 24,
- Number of PRBs: 25
- Modulation type: QPSK
- Transport block size: 4008
Type new MCS index and press Enter: Done
root@root-VirtualBox:~/srsLTE/build/srslte/examples$ ./pdsch_ue -i "pdsch.out" -n 10 -r 1234
linux; GNU C++ version 5.3.1 20160413; Boost_105800; UHD_003.009.004-release
- Cell ID: 0
- Nof ports: 1
- CP: Normal
- PRB: 25
- PHICH Length: Normal
- PHICH Resources: 1
- SFN: 0
Decoded MIB. SFN: 0, offset: 0
CFO: +0.00 kHz, SNR: 139.3 dB, PDCCH-Miss: 20.00%, PDSCH-BLER: 0.00%
Bye
Now you can decode this downlink radio frames with using pdsch_ue as shown below.
# ~/srsLTE/build/srslte/examples$ ./pdsch_ue -i "pdsch.out" -n 10 -r 1234
linux; GNU C++ version 5.3.1 20160413; Boost_105800; UHD_003.009.004-release
- Cell ID: 0
- Nof ports: 1
- CP: Normal
- PRB: 25
- PHICH Length: Normal
- PHICH Resources: 1
- SFN: 0
Decoded MIB. SFN: 0, offset: 0
CFO: +0.00 kHz, SNR: 139.3 dB, PDCCH-Miss: 20.00%, PDSCH-BLER: 0.00%
Bye
This is it. Now have fun !
If you want to get more detailed information about generation and decoding process, you can use -v option as follows.
#~/srsLTE/build/srslte/examples$ ./pdsch_enodeb -o "pdsch.out" -n 10 -m 9 -v
linux; GNU C++ version 5.3.1 20160413; Boost_105800; UHD_003.009.004-release
[INFO]: Indexing 200 REGs. CellId: 0, 25 PRB, CP: Normal
[INFO]: PCFICH allocating 4 regs. CellID: 0, PRB: 25
[INFO]: Creating 4 PHICH mapping units. Normal length, Ng=1.00
[INFO]: Init PDCCH REG space CFI 1. 27 useful REGs (3 CCEs)
[INFO]: Init PDCCH REG space CFI 2. 108 useful REGs (12 CCEs)
[INFO]: Init PDCCH REG space CFI 3. 180 useful REGs (20 CCEs)
[INFO]: Init PDCCH: Max bits: 1440, 1 ports.
[INFO]: Init PDSCH: 1 ports 25 PRBs, max_symbols: 4200
- Resource Allocation Type: Type 0
+ Resource Block Group Size: 2
+ RBG Bitmap: 0x1fff
- Modulation and coding scheme index: 9
- HARQ process: 0
- New data indicator: No
- Redundancy version: 0
- TPC command for PUCCH: --
- PRB Bitmap Assignment 0st slot:
0, 1, 2, 3, 4, 5, 6, 7, 8, 9, 10, 11, 12, 13, 14, 15, 16, 17, 18, 19, 20, 21, 22, 23, 24,
- PRB Bitmap Assignment 1st slot:
0, 1, 2, 3, 4, 5, 6, 7, 8, 9, 10, 11, 12, 13, 14, 15, 16, 17, 18, 19, 20, 21, 22, 23, 24,
- Number of PRBs: 25
- Modulation type: QPSK
- Transport block size: 4008
Type new MCS index and press Enter: [INFO]: SF: 0, Generating 0 random bits
[INFO]: SF: 1, Generating 0 random bits
[INFO]: Putting DCI to location: n=8, L=3
[INFO]: CB Segmentation: TBS: 4008, C=1, C+=1 K+=4032, C-=0, K-=0, F=0, Bp=4032
[INFO]: Encoding PDSCH SF: 1, Mod QPSK, NofBits: 4008, NofSymbols: 3150, NofBitsE: 6300, rv_idx: 0
[INFO]: CB#0: cb_len: 4032, rlen: 4032, wp: 0, rp: 0, E: 6300
[INFO]: Last CB, appending parity: 4008 from 0 and 24 to 4008
[INFO]: END CB#1: wp: 6300, rp: 4032
[INFO]: SF: 2, Generating 4008 random bits
....
In the same way, you can get more detailed information about the decoded result as shown below.
# ~/srsLTE/build/srslte/examples$ ./pdsch_ue -i "pdsch.out" -n 10 -r 1234 -v
linux; GNU C++ version 5.3.1 20160413; Boost_105800; UHD_003.009.004-release
[INFO]: Offseting input file by 0 samples and 0.0 kHz
[INFO]: Indexing 200 REGs. CellId: 0, 25 PRB, CP: Normal
[INFO]: PCFICH allocating 4 regs. CellID: 0, PRB: 25
[INFO]: Creating 4 PHICH mapping units. Normal length, Ng=1.00
[INFO]: Init PDCCH REG space CFI 1. 27 useful REGs (3 CCEs)
[INFO]: Init PDCCH REG space CFI 2. 108 useful REGs (12 CCEs)
[INFO]: Init PDCCH REG space CFI 3. 180 useful REGs (20 CCEs)
[INFO]: Init PDCCH: Max bits: 1440, 1 ports.
[INFO]: Init PDSCH: 1 ports 25 PRBs, max_symbols: 4200
[INFO]:
Entering main loop...
[INFO]: Reading 5760 samples. sf_idx = 0
[INFO]: Decoded PBCH: src=0, dst=0, nb=1, sfn_offset=0
[INFO]: MIB decoded: 0
- Cell ID: 0
- Nof ports: 1
- CP: Normal
- PRB: 25
- PHICH Length: Normal
- PHICH Resources: 1
- SFN: 0
Decoded MIB. SFN: 0, offset: 0
[INFO]: Reading 5760 samples. sf_idx = 1
[INFO]: Attempting DL decode SFN=0
[INFO]: Decoded CFI=3 with correlation 32.00, sf_idx=1
[INFO]: Found DCI nCCE: 8, L: 3, n_bits=27
[INFO]: Format1 PDSCH Scheduling
- Resource Allocation Type: Type 0
+ Resource Block Group Size: 2
+ RBG Bitmap: 0x1fff
- Modulation and coding scheme index: 9
- HARQ process: 0
- New data indicator: No
- Redundancy version: 0
- TPC command for PUCCH: --
- PRB Bitmap Assignment 0st slot:
0, 1, 2, 3, 4, 5, 6, 7, 8, 9, 10, 11, 12, 13, 14, 15, 16, 17, 18, 19, 20, 21, 22, 23, 24,
- PRB Bitmap Assignment 1st slot:
0, 1, 2, 3, 4, 5, 6, 7, 8, 9, 10, 11, 12, 13, 14, 15, 16, 17, 18, 19, 20, 21, 22, 23, 24,
- Number of PRBs: 25
- Modulation type: QPSK
- Transport block size: 4008
[INFO]: CB Segmentation: TBS: 4008, C=1, C+=1 K+=4032, C-=0, K-=0, F=0, Bp=4032
[INFO]: Decoding PDSCH SF: 1, RNTI: 0x1234, Mod QPSK, TBS: 4008, NofSymbols: 3150, NofBitsE: 6300, rv_idx: 0, C_prb=25
[INFO]: CB#0: cb_len: 4032, rlen: 4032, wp: 0, rp: 0, E: 6300, n_iters=1
[INFO]: END CB#1: wp: 4032, rp: 6300
[INFO]:
CAUTION!! Received all-zero transport block
[INFO]: TB decoded OK
[INFO]: Reading 5760 samples. sf_idx = 2
[INFO]: Attempting DL decode SFN=0
[INFO]: Decoded CFI=3 with correlation 32.00, sf_idx=2
[INFO]: Found DCI nCCE: 8, L: 3, n_bits=27
[INFO]: Format1 PDSCH Scheduling
- Resource Allocation Type: Type 0
+ Resource Block Group Size: 2
+ RBG Bitmap: 0x1fff
- Modulation and coding scheme index: 9
- HARQ process: 0
- New data indicator: No
- Redundancy version: 0
- TPC command for PUCCH: --
- PRB Bitmap Assignment 0st slot:
0, 1, 2, 3, 4, 5, 6, 7, 8, 9, 10, 11, 12, 13, 14, 15, 16, 17, 18, 19, 20, 21, 22, 23, 24,
- PRB Bitmap Assignment 1st slot:
0, 1, 2, 3, 4, 5, 6, 7, 8, 9, 10, 11, 12, 13, 14, 15, 16, 17, 18, 19, 20, 21, 22, 23, 24,
- Number of PRBs: 25
- Modulation type: QPSK
- Transport block size: 4008
[INFO]: CB Segmentation: TBS: 4008, C=1, C+=1 K+=4032, C-=0, K-=0, F=0, Bp=4032
[INFO]: Decoding PDSCH SF: 2, RNTI: 0x1234, Mod QPSK, TBS: 4008, NofSymbols: 3150, NofBitsE: 6300, rv_idx: 0, C_prb=25
[INFO]: CB#0: cb_len: 4032, rlen: 4032, wp: 0, rp: 0, E: 6300, n_iters=1
[INFO]: END CB#1: wp: 4032, rp: 6300
[INFO]: TB decoded OK
[INFO]: Reading 5760 samples. sf_idx = 3
[INFO]: Attempting DL decode SFN=0
[INFO]: Decoded CFI=3 with correlation 32.00, sf_idx=3
[INFO]: Found DCI nCCE: 8, L: 3, n_bits=27
[INFO]: Format1 PDSCH Scheduling
- Resource Allocation Type: Type 0
+ Resource Block Group Size: 2
+ RBG Bitmap: 0x1fff
- Modulation and coding scheme index: 9
- HARQ process: 0
- New data indicator: No
- Redundancy version: 0
- TPC command for PUCCH: --
- PRB Bitmap Assignment 0st slot:
0, 1, 2, 3, 4, 5, 6, 7, 8, 9, 10, 11, 12, 13, 14, 15, 16, 17, 18, 19, 20, 21, 22, 23, 24,
- PRB Bitmap Assignment 1st slot:
0, 1, 2, 3, 4, 5, 6, 7, 8, 9, 10, 11, 12, 13, 14, 15, 16, 17, 18, 19, 20, 21, 22, 23, 24,
- Number of PRBs: 25
- Modulation type: QPSK
- Transport block size: 4008
....