|
Embedded System |
||
|
GPIO
In Embedded World, you would hear a lot about GPIO. What is a GPIO ? You may easily guess 'IO' stands for 'Input / Output', but not sure of what 'GP' mean. GP stands for General Purpose. So, GPIO stands for General Purpose Input / Output. You would see many pins on a Microcontroller that can be used as Input pin or Output pin. If you are a chipset designer, it would be simpler to design each of the pins to be used only for single purpose. For example, pin 0 is only for input, pin 1 is only for output, pin 3,4 are only for I2C. However, in this case you would need huge number of pins on the microcontroller to provide such a diverse in / out functionalities that is required in most of the application. I think the concept of GPIO is invented to handle this kind of situation. It is to provide more I/O functionality with a small number of pins. How ? The fundamental Idea behind GPIO is to provide a kind of 'programming' capability for the pin. In reality, they put one or more registers to a GPIO pin and let a pin to perform different functionality depending on the value stored to the register. In this way, a single GPIO pin can be Input or Output or Serial Communication pin depending on the configuration.
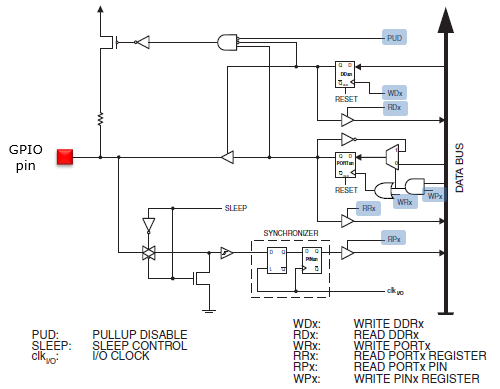
Following is the control (configuration) circuit for the digital GPIO pin on ATmega328 (Microcontroller on Arduino). As you see here, one GPIO pin can be configured for various functions via the pins shaded in blue. These control pins are connected to a few special registers that can be set or read by program.
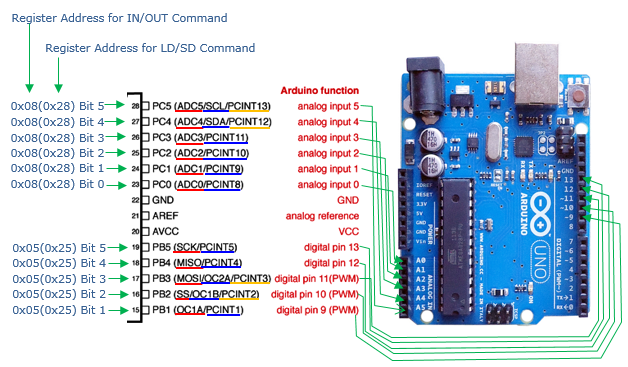
Let me give you a couple of examples of GPIO. Following example shows GPIOs on ATmega Microcontroller (Left) and pin connection on Arduino board. You don't have to know the details of each of these GPIOs unless you are working on Arduino board right now. Just note that most of the pin on chipset has multiple functions as underlined in Red, Blue, Orange. When you using these pins, you need to decide how (what purpose) you want to use it and configure in your program to make the pin work as you intended.
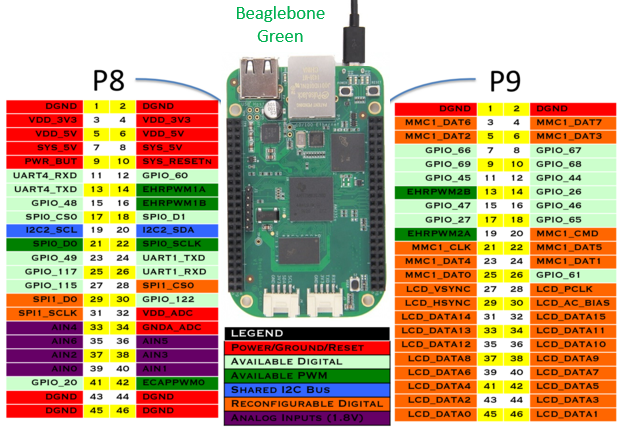
Following is another example of GPIOs on Beablebone board. I know this is complicated.. you would need to spend more time to figure out on how to configure these pins comparing to Arduino GPIO. If you are interested in how to configure these GPIO pins in real programming, refer to Beaglebone : Programing in C page.
Reference :
[1]
|
||


