|
Operating System |
||
|
Writing OS : Bootloader : Assembly
Now in this page, I will do the exactly same thing that I did in previous tutorial but in a little bit different way. In previous example, we wrote the boot sector data directly by hex editor, but in this tutorial we create the boot sector data using the assmebly program.
The Simplest Booloader
First using any kind of text editor (I used Notepad++), create a file named my_boot.asm and type in the code as follows.
Since the purpose of this tutorial is not for assembly language itself, I would not go deeply into the meaning of the code. If you are already familiar with assembly language you would easily understand what this mean. If you are not familiar with the assembly language, just copy these lines. However, you would need to study the fundamentals of assembly language. It would be almost impossible for you to write operating system without know assembly language.
Just for the person who is not familiar with assembly language, I would put a very short comments on each of the code used in the example. In this code, first you would want to know of the meaning of two symbols $ and $$. Refer to 3.5 Expressions of Chapter 3: The NASM Language for the details.
jmp $ ; jump to the beginning of the line. This create an infinite loop times 510-($-$$) db 0 ; fill out '0' in all the bytes from the current position to the 510th bytes dw 0xAA55 ; Write a word (2 bytes) data 0xAA55 at current position. This write 55 at 511th byte and AA at 512th byte. Why 55 in 0xAA55 gets written earlier than AA in the file ? It is a little bit complicated to explain.. but just to say the conclusion, it is because Intel chipset is using Little Endian format.
Now save the file. You can confirm that the file is created as shown below.
Now compile the assembly code as follows and it will create a binary file named my_boot.bin c:\my_os>c:\nasm\nasm my_boot.asm -f bin -o my_boot.bin
Confirm that the binary file is created as follows.
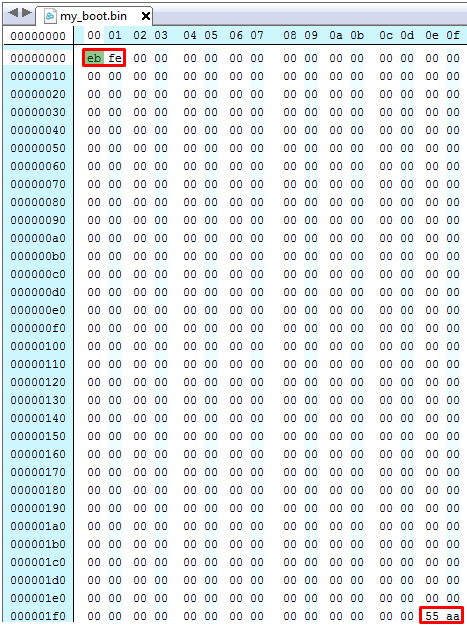
To see what is created by the assembly code, open the binary file using the hex editor. You will see the exact same 512 Byte as you created in the previous tutorial.
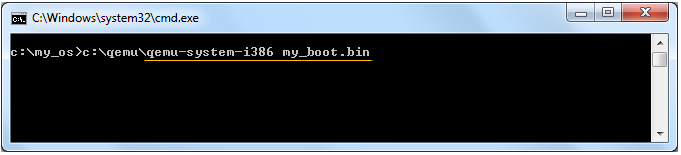
Now try to boot up the PC with the binary file (boot sector) that you created
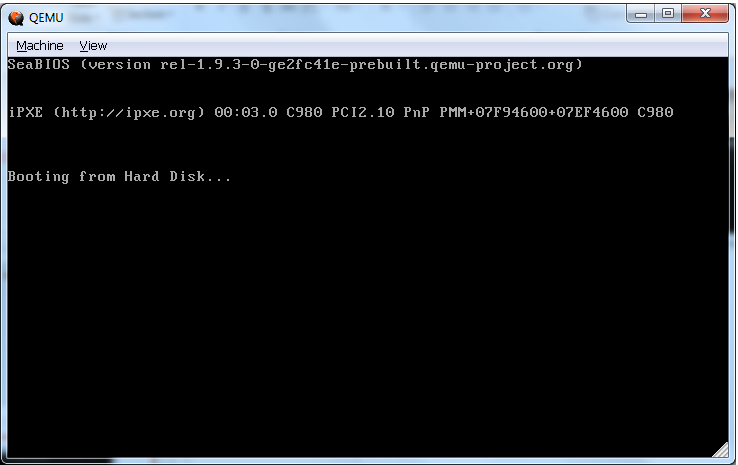
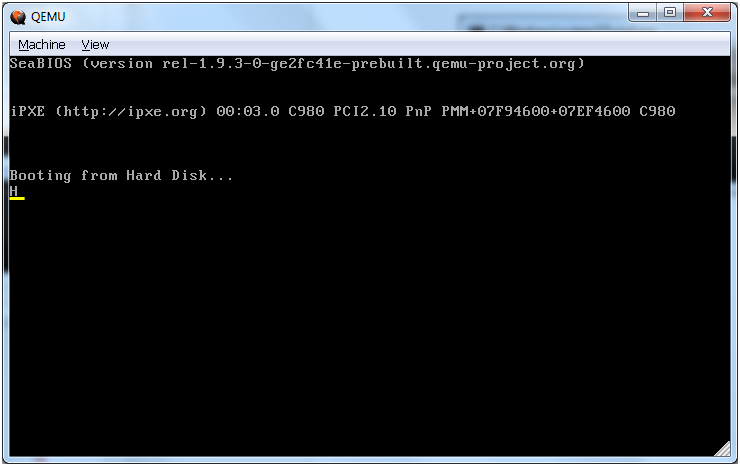
Then you will have the result as shown below.
The Booloader displaying a character 'H'
Now just change the assmbly code as follows and do the exactly same procedure as you did in previous section. mov ah,0x0E mov al,'H' int 0x10
jmp $ times 510-($-$$) db 0 dw 0xAA55 The first 3 line is the procedure to print a character 'H' on the screen. To understand this code, you need to understand how INTERUPT 10h (int 0x10) works in Intel processor. Refer to Wikipedia INT 10 for the details. However, you would need a general understandings on what is Interrupt and how Interrupt handler works and the basics of assembly languate to understand the details of the document. If you are not at this stage, just copy this code and try it for now.
Complile the assembly code and run the command as shown below.
Then you will get the screen as shown below. As you see here... you see the character 'H' printed on the screen.
The Booloader displaying a character 'Hello'
Now just change the code as follows. You can easily see that this is to print out a string 'Hello'. In real programming, you would not see any professional programer implementing the code like this. They would create a sub routine (function) to print out any string with any length using a loop. But it would be a little harder to understand the code if you are not familiar with the assembly. So I just write it in the most primitive and least flexible way, but easiest to understand :) mov ah,0x0E mov al,'H' int 0x10 mov al,'e' int 0x10 mov al,'l' int 0x10 mov al,'l' int 0x10 mov al,'o' int 0x10
jmp $ times 510-($-$$) db 0 dw 0xAA55 Complile the assembly code and run the command as shown below.
Then you will get the screen as shown below. As you see here... you see the character 'H' printed on the screen.
Reference
[1] OS Development: Low-level Boot-Sector Programming (1/9) [2] OS Development: Low-level Boot-Sector Programming (2/9) [3] OS Development: Low-level Boot-Sector Programming (3/9) [4] OS Development: Low-level Boot-Sector Programming (4/9) [5] OS Development: Low-level Boot-Sector Programming (5/9) [6] OS Development: Low-level Boot-Sector Programming (6/9) [7] OS Development: Low-level Boot-Sector Programming (7/9) [8] OS Development: Low-level Boot-Sector Programming (8/9) [9] OS Development: Low-level Boot-Sector Programming (9/9) [10] Basic OS Development Tutorial Part 1 - Setup & First Boot [11] Basic OS Development Tutorial Part 2 - Registers, Interrupts, and printing [12] Basic OS Development Tutorial Part 3 - Printing Strings and Pointers [13] Basic OS Development Tutorial Part 4 - Kind Of [14] The Netwide Assembler: NASM - Document
|
||