|
Linux |
||
|
Virtual Machine on Google Cloud
This is for the record of several hours of my first experience on Virtual Machine on a Cloud. I am completely new to this type of applications and have no experties. Long time ago I tried to setup this kind of system both on AWS and Azure but failed with both. They look just too complicated to me. I am not saying that those systems has any problem.. but I felt I would need more experience just to setup a basic system on those platform. After several months later, I just came to think of trying it again on a different platform, that is, Google Cloud. At least, it looks much simpler and intuitive to setup a system on Google Cloud and made a very simple system work for me. This note is the record of how I set up a simple virtual machine on Google Cloud and configure it as I needed. However, this is not a step-by-step tutorial. For those step by step tutorial, it would be better to look for videos on YouTube. This note is more of a list of tips that doesn't seem to be captured in the video (not captured at least in those videos that I referred to).
The simple system that I wanted to configure is to setup a virtual machine on the cloud and run a ubuntu in it, making a similar system that I am using on my local PC. In my dail life, I am using several Linux PC, but in most case I am not using those Linux PC directly. The main PC that I am using is a Windows PC and controlling the Linux PC using ssh. For the file exchange between my Windows PC and the Linux PC using WinSCP. I just wanted to build a same setup on the Cloud.
Following is the summary of the virtual machine configuration that I created. I would not explain about the step by step procedure since you may find better tutorial (like YouTube videos) for the creation procedure.
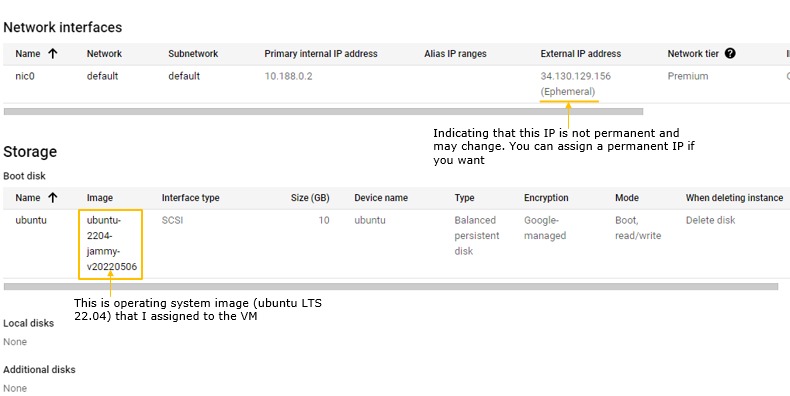
NOTE : By default, the External IP is set as Ephemeral (meaning 'Not permanent'). In this case, the IP would not change even when you reboot in command line (e.g, ssh console), but if you reboot the virtual machine using the button shown below, the IP would change everytime you restart
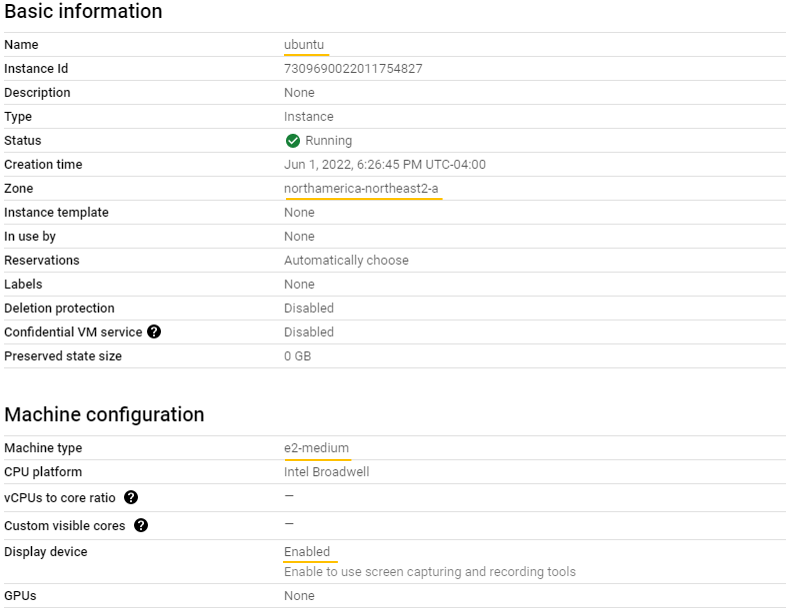
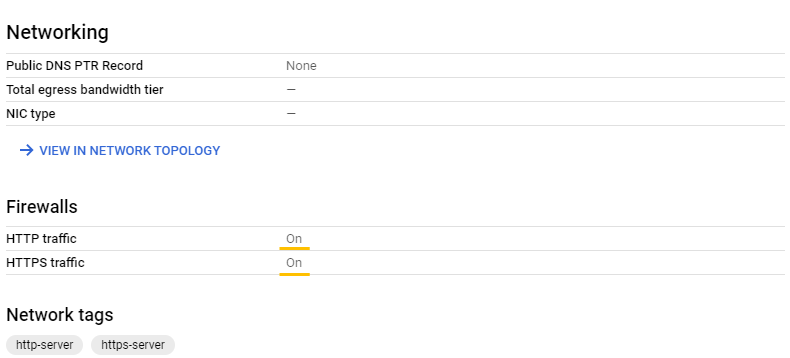
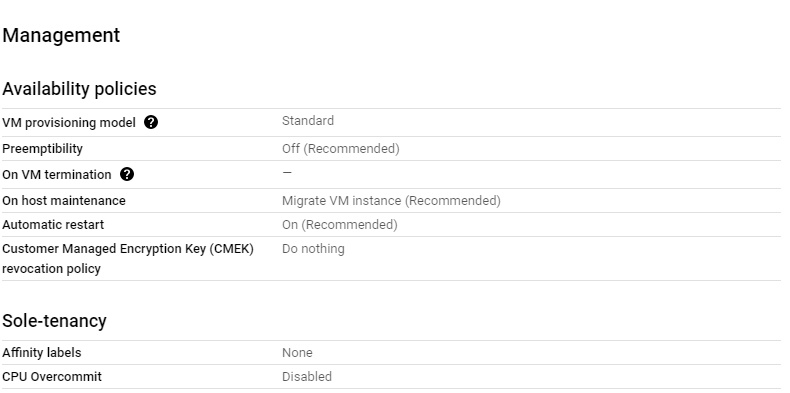
The screenshots shown below is the configuration of the VM(Virtual Machine) instances that I've created for this note. The part underlined in orange is those that I specified myself and other parts are the detault settings.
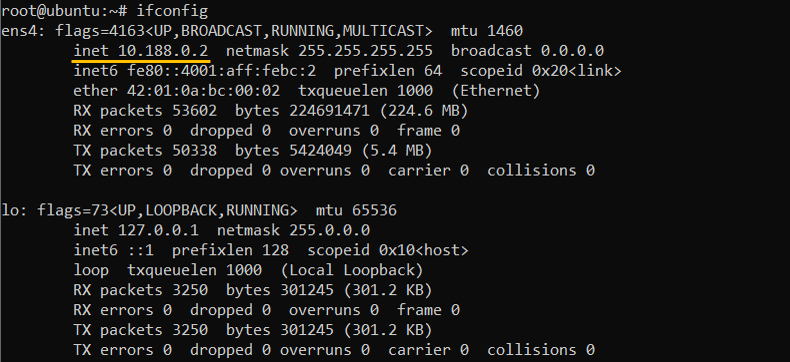
Once you setup the VM and check IP configuration, you would get something as shown below. You see the IP assigned as Primary Internal IP address. The External IP is not shown here, but if you get access to the VM with external IP, it is automatically translated to the internal IP.
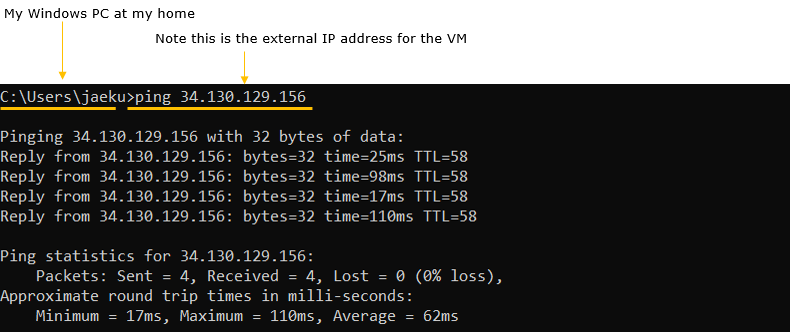
As a test, I pinged to the VM from my PC at home with external IP and got reply as expected. (NOTE : you would not get any reply in this case if you ping to the internal IP)
SSH Connection Setup with Windows Command Line
I have created the SSH key according to this tutorial. The remote PC that I am using is a Windows 10 PC. The procedure is same in linux.. only some command line commad is different between Windows and Linux.
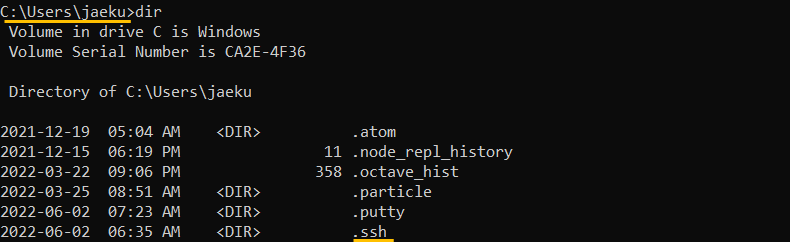
I have created the ssh key in the folder C:\Users\jaeku. When the key is generated, it is saved in the .ssh foder.
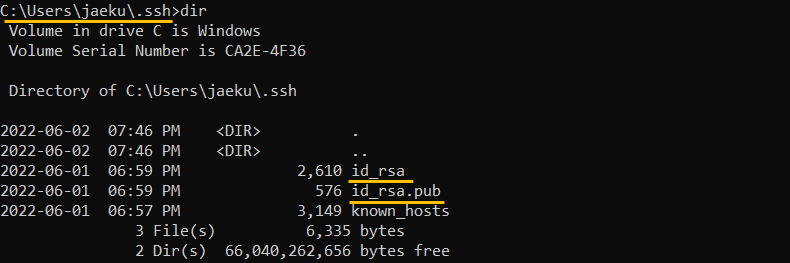
If you go into the .ssh directory, you would see the two keys are generated. id_rsa is the private key file and id_rsa.pub is the public key file.
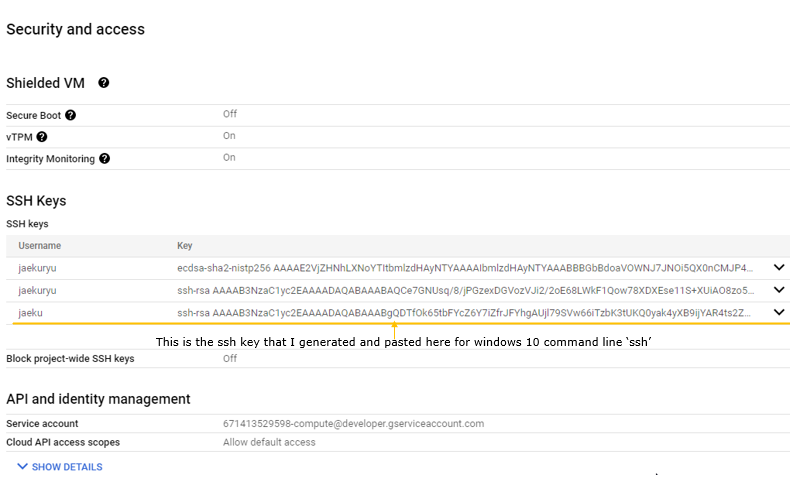
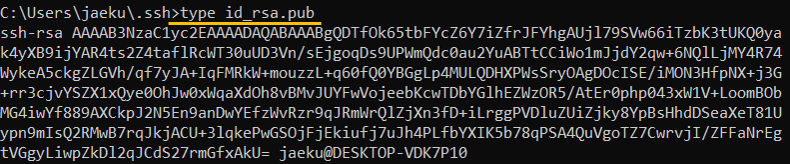
Print out the contents of the public key(id_rsa.pub) on the console and copy the content and paste it into the SSH section of the virtual machine.
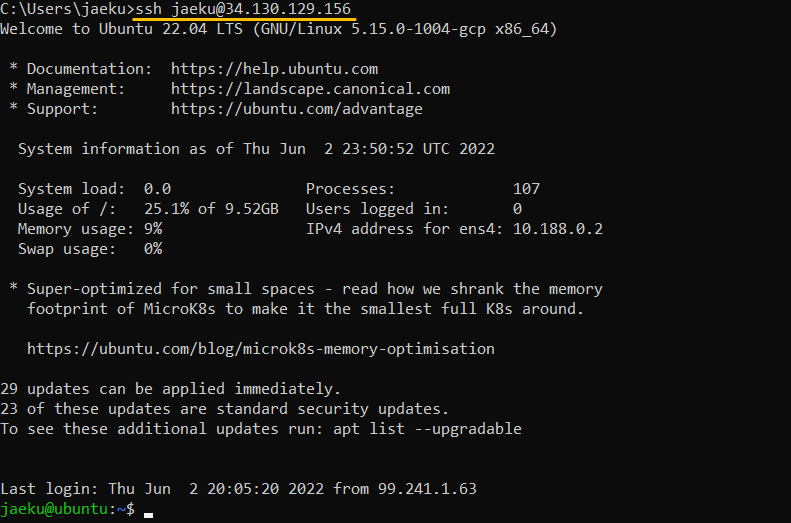
If the public key is properly pasted into the SSH Key section in the VM instance on Clould, you should be able to get access to the VM using SSH as shown below.
Allowing password authentication for SSH
You may feel inconvenient to generate the SSH Key for every users (at least it is not so convenient for me). Even more tricky thing is that you have to configure the SSH private key for every software tools using SSH (e.g, PuTTY, WinSCP etc) and it does not work well as expected. So more convenient way would be to use the password authentication. To allow the password authentication, you need to change configuration of ssdh (SSH daemon) on the server (the VM on the Cloud in this case). Configuration change is simple, just set PasswordAuthentication to yes in /etc/ssh/sshd_config file as shown below.
There are two places you can put the SSH key. One is the SSH key section within each instances of the virtual machine and the other one is the SSH keys section in Metadata. If you see various tutorials in YouTube, you would notice somebody put the keys in the virtual machine instance and some others put it in Meta data. Of course, you can put the keys anywhere you like, but it would be worth understanding the differences between the two places. If you put the Key in an instance of a virtual machine, the key applies only to the specific instances of the virtual machine. It means.. if you create another instances of a virtual machine, you have to put the key again to the new virtual machine. On the contrary, if you put the key in the metadata section, the key applies to every instances of the virtual machine. It mean.. once you put the key in the metadata section, you don't have to put the key again to any new instances of the virtual machine as long as you create the virtual machine in the same project.
I have setup passwords for root and some other users according to this tutorial.
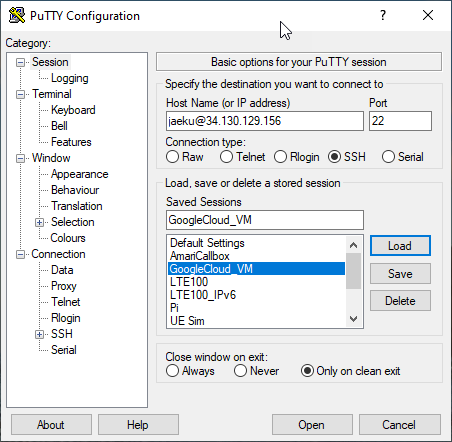
Once you enabled the password authentication, you may try with other tools like PuTTY. (You can still use rsa key method with PuTTY, but somehow I never got it working with RSA key method but had no problem with password authentication).
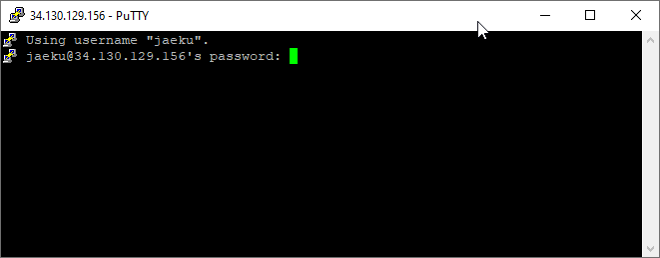
Try the password you set in VM on cloud and see if it works.
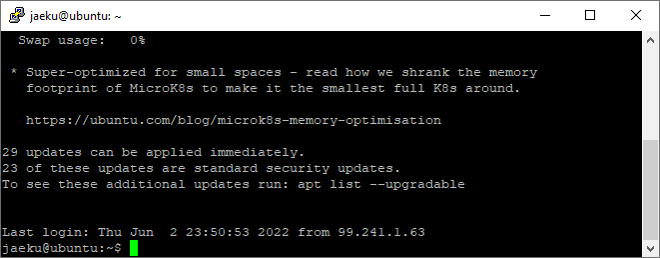
It worked OK for me as shown below.
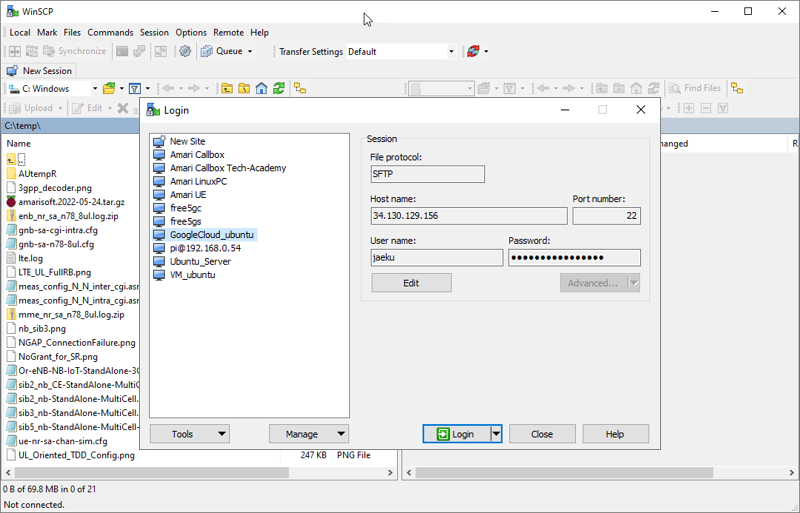
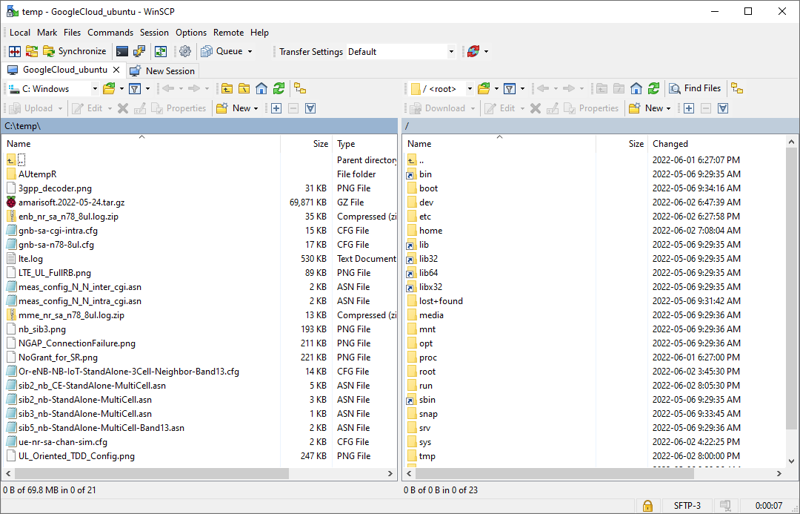
A tool that I am using most frequently with remote machine is WinSCP. (NOTE : The reason why I am using WinSCP instead of ftp (like FileZilla) is because I can get access to any directories in the remote machine with WinSCP whereas you can access to only a specified directly with ftp). If you are not familiar with WinSCP, you may check out this note.
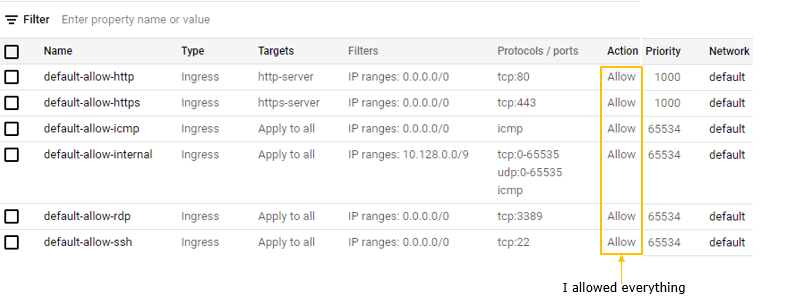
Configure the connection setup to the external IP of the VM as shown below (NOTE : you need to use SFTP and port number 22. If you want to use other protocol, you may need to add firewall config and may install another program on VM).
If the access is successful, you would get the directory structure as shown on the right panel.
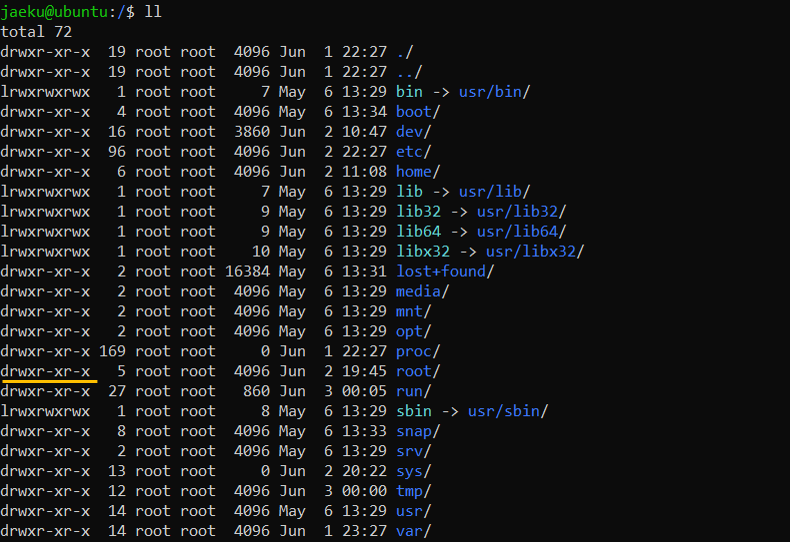
One of the difficulties using GUI based clienet tool (like WinSCP) is that you may get blocked to get access to /root directory. In case of using console based tool, you may easily get access to /root directory after you get root previlage of root user by su command, but in many GUI based on client this kind of previlage change is not allowed. You many find various tips and tricks on the internet to get around this kind of issue, but most of those tips/tricks didn't work on my side or too complicated for me to try. The simple and laziest way that I am using is just to change access privalage to the root directly using chmod command to allow other user to get access. This may not be good way to do in terms of security perspective, but just for simple testing purpose (like me) which does not have much of security concern, this can be a simple solution.
|
||