|
Android - Android Studio |
||
|
First App
Usually I would start with 'Hello World !' for any other language, but in Android Studio case I decided to write a page even before 'Hello World'. Even when you completed the download and the installation, you still cannot guarantee that you got all the necessary component to run the App you created. So I tried to create the simplest sample App (Empty App) provided by Android Studio and see I can build and run it in Android Virtual Phone. As you might have guessed by now, I will see a very important addition component setup procedure in this tutorial. If you are not familiar with Android App development procedure, I would recommend you to read through this tutorial before you are trying to create your own App.
NOTE : I tried this using Android Studio Version 3.0. You may see a little bit different screens or procedure if you are using different version, but at least you would get some general idea on overall procedure of App creation and execution.
Following is the list of the topics I will convert in this page.
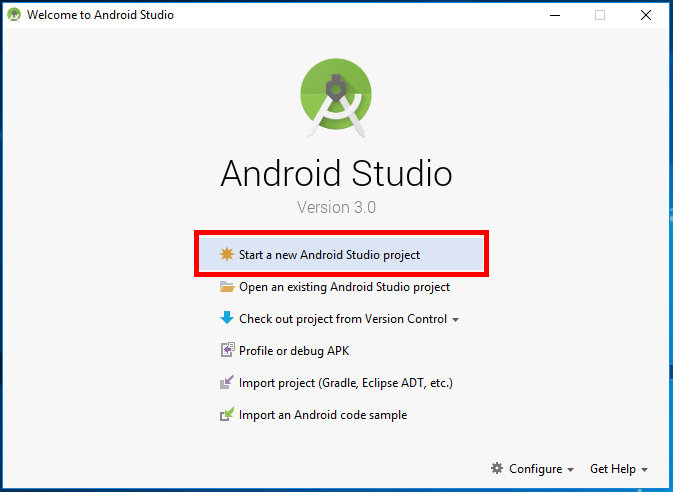
Launch Android Studio and you will get the first screen as shown below. Click [Start a new Android Studio Project].
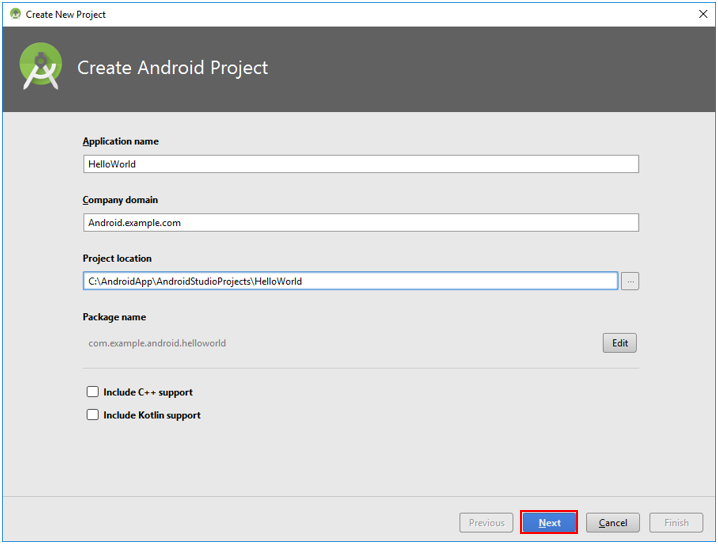
Specify Application Name and Project location. You can change Company domain field as you like if you want. and then click [Next].
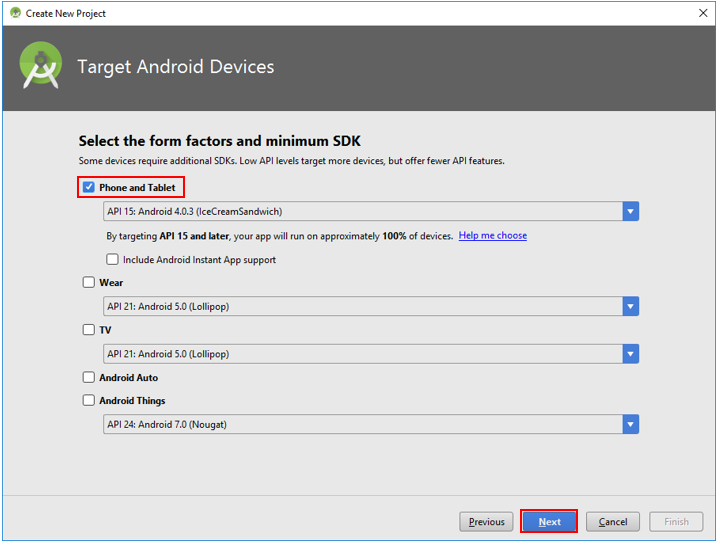
Select [Phone and Tablet] and click [Next]. If you like, you can change API as you like, but I just leave it as default.
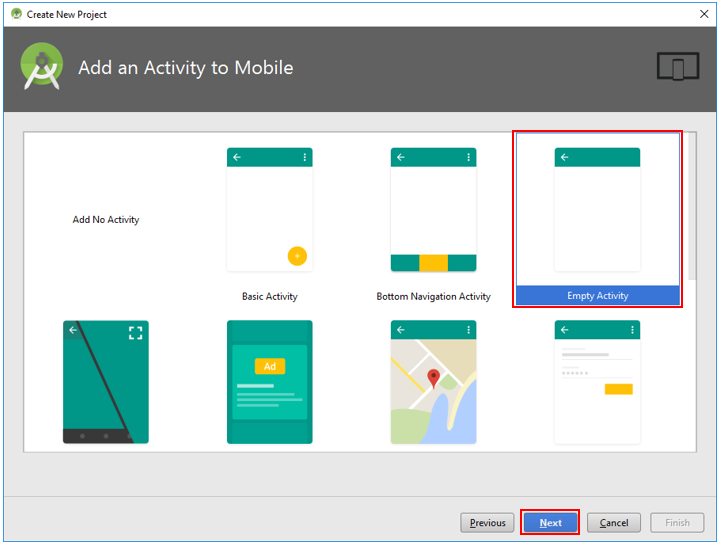
Select the template of the App you want to create and click [Next]. I selected [Empty Activity] as shown below.
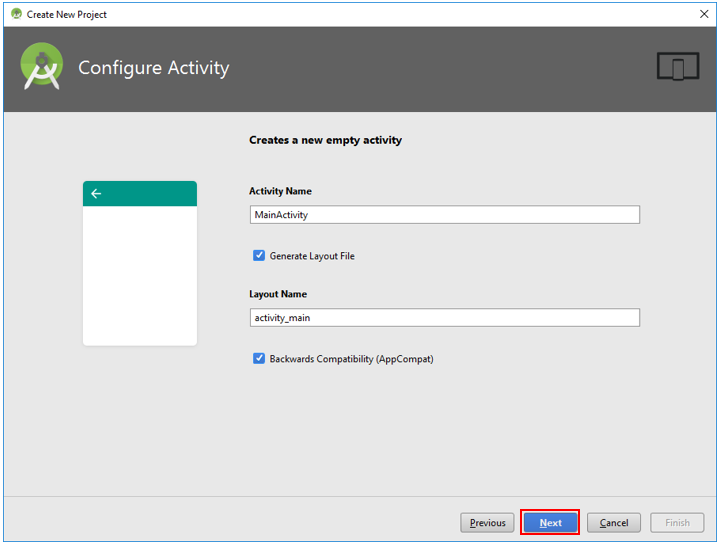
Specify Activity Name and Layout Name and click [Next]. I leave everything as default on this screen.
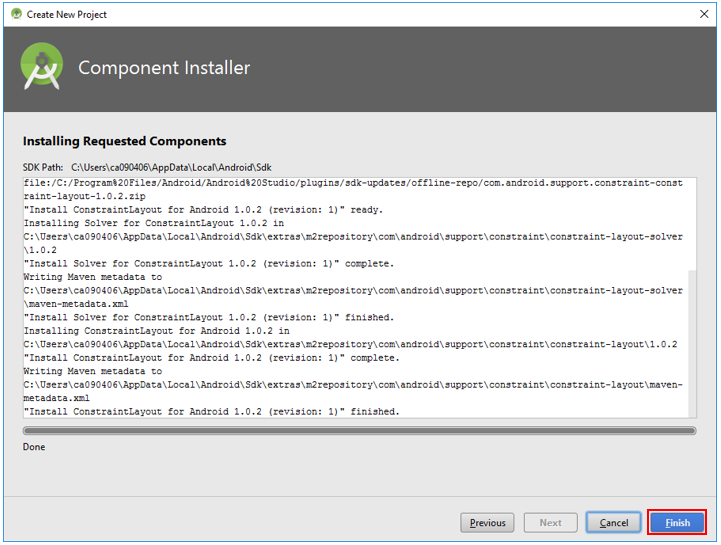
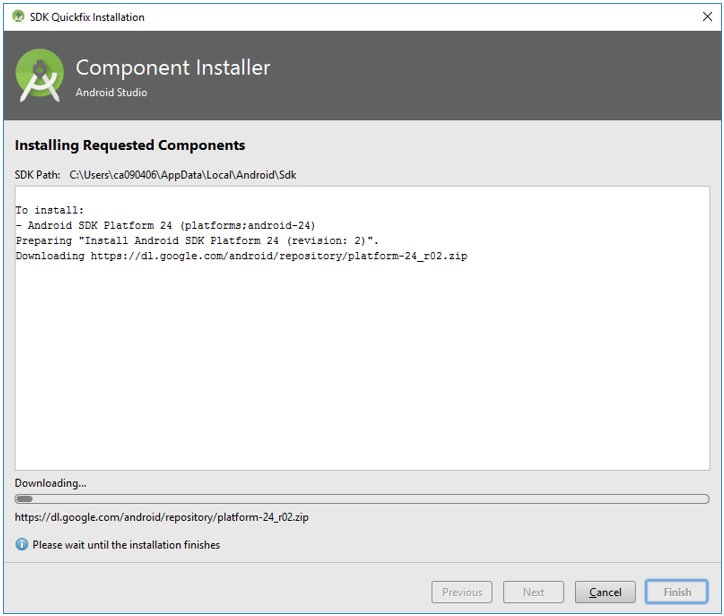
Here you see that Android Studio is downloading a lot of other components that is required to build the App template that you've selected before. Click [Finish] when the component installation is done.
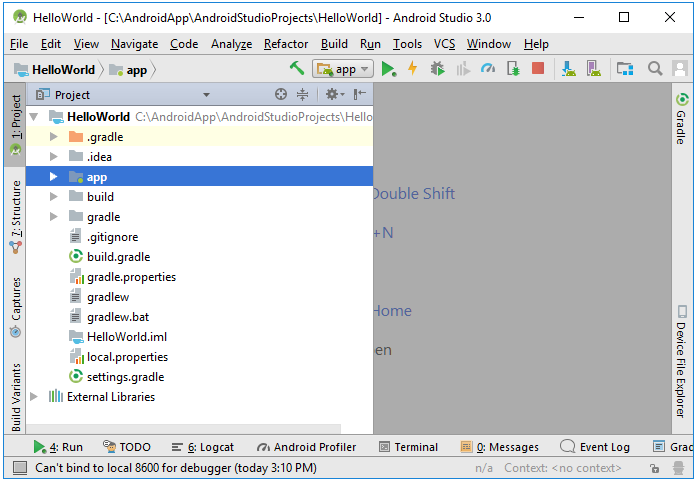
Then you would get a project created as shown below.
Don't do anything like adding the code and create any user interface. Just try build the project as shown below.
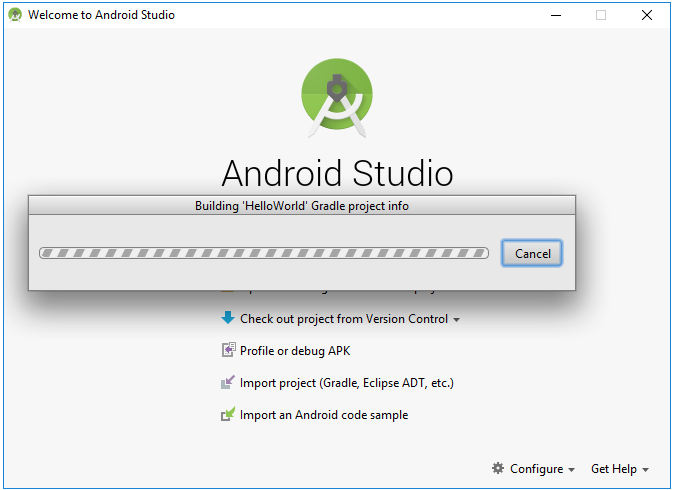
Now Android Studio is bulding the project as shown below.
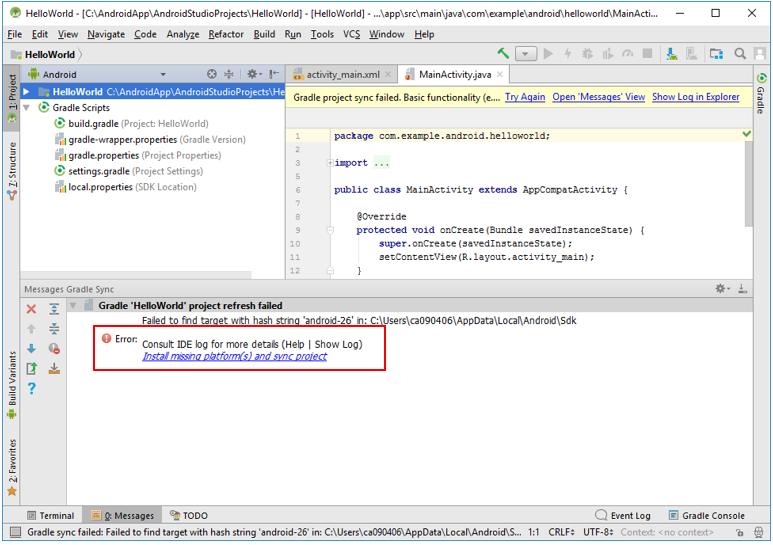
If the build gets completed at the first try, you are lucky. But it may complain about some missing component like the one shown below and stop the build process. If you see this kind of error, click on the hyperlink saying 'Install xxxxx'.
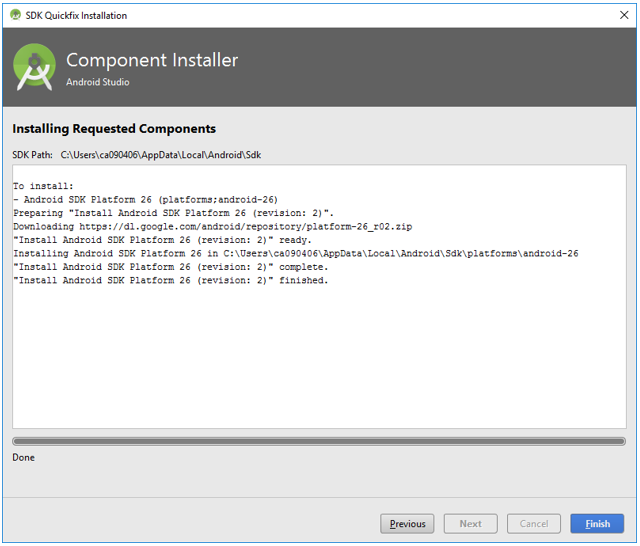
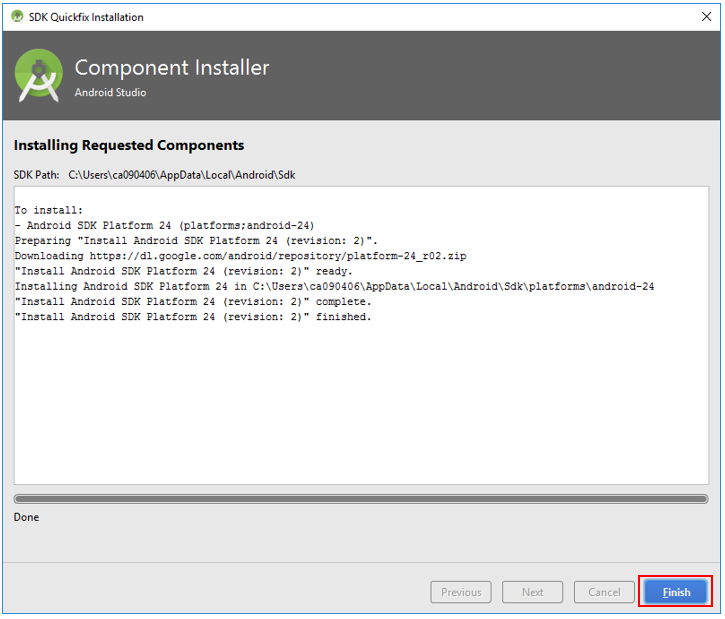
Android Studio will download the necessary component again and install. Wait until everything gets installed and click [Finish]. This installation process may take a while.
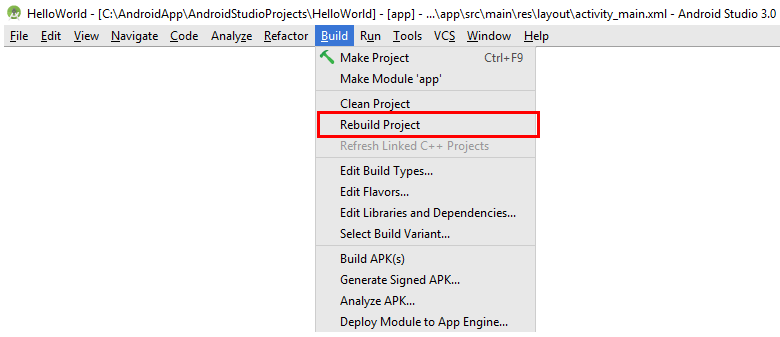
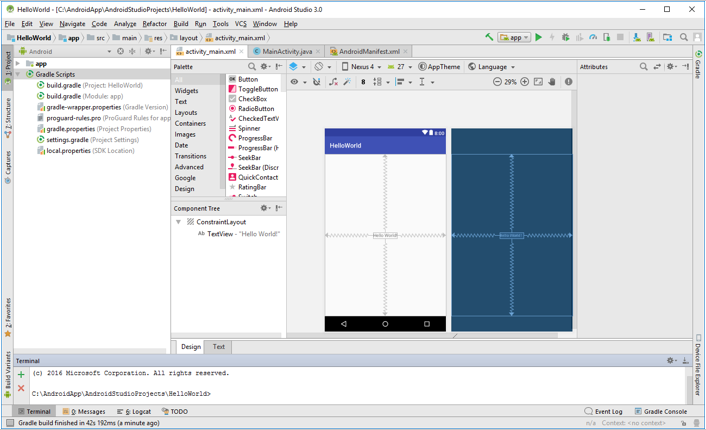
And then trying [Rebuild] again and see if it goes to the completion. You may get another error complaining about missing another components as we saw above. Then install the component in the same way you did before. And repeat this process until the build is done. Then you may see a screen as shown below. Don't worry if you don't get this design screen. It is OK just if the build is complete without any error.
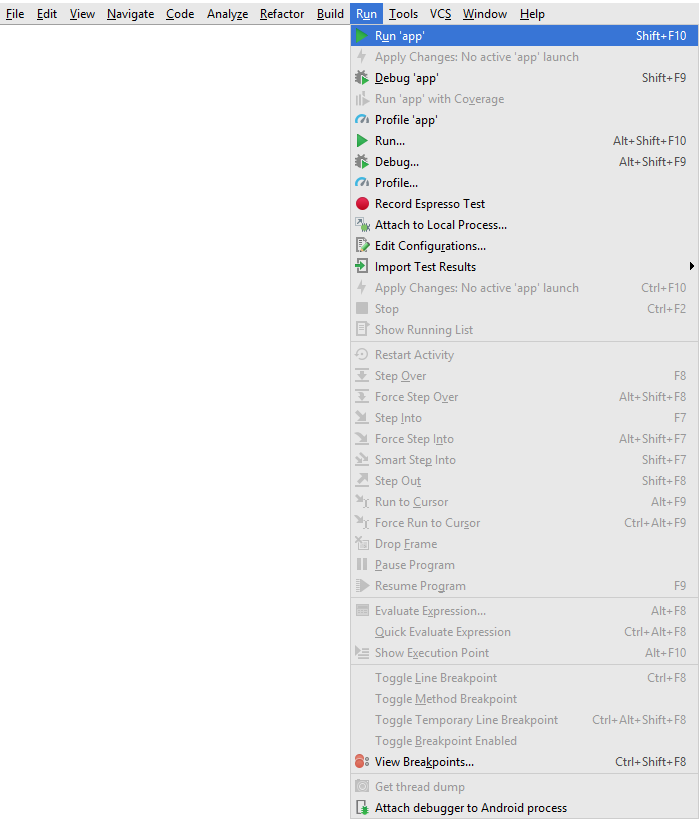
Now it is time to run the App. Run the App as shown below (Unfortunatley you may need to go through another complicated installation process after this)
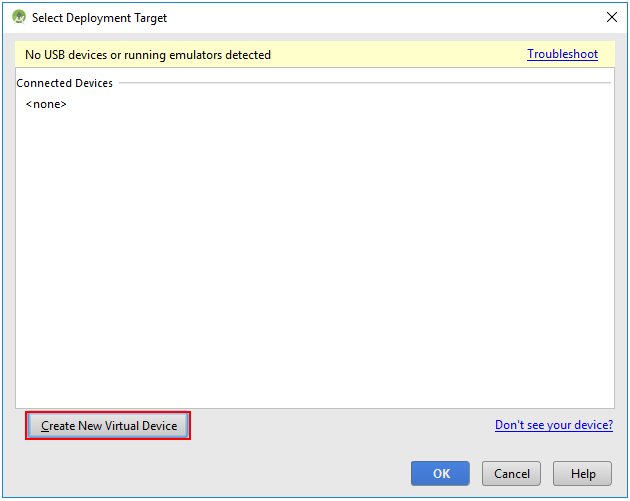
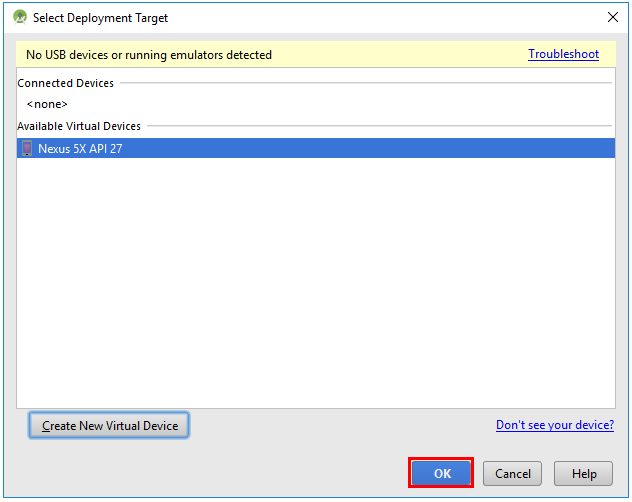
You will get the popup showing the list of the device (virtual device) on which you can run the App. However you don't have anything here since this is the first time you run the App and never created any Virtual device before. In this case, you need to create a new virtual device by clicking [Create New Virtual Device] button.
NOTE : You need to go through this process only once when you try to run the App for the first time unless you want to add any new Virtual Device. From next run, you only need to select the virtual device you've created and run it.
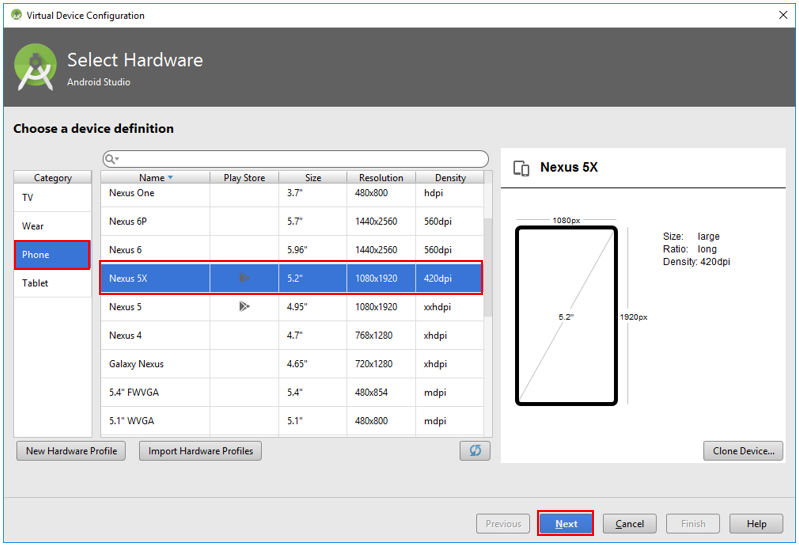
Then select the type of the virtual device you want to use and click [Next] button.
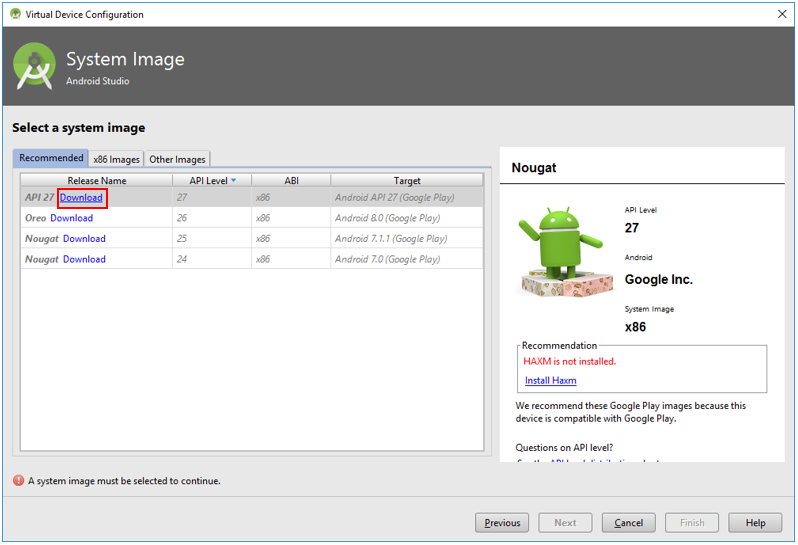
Then you may have another popup as shown below prompting you to download some more components (how many more component I need to install !!!!!! ). Click the Downlink.
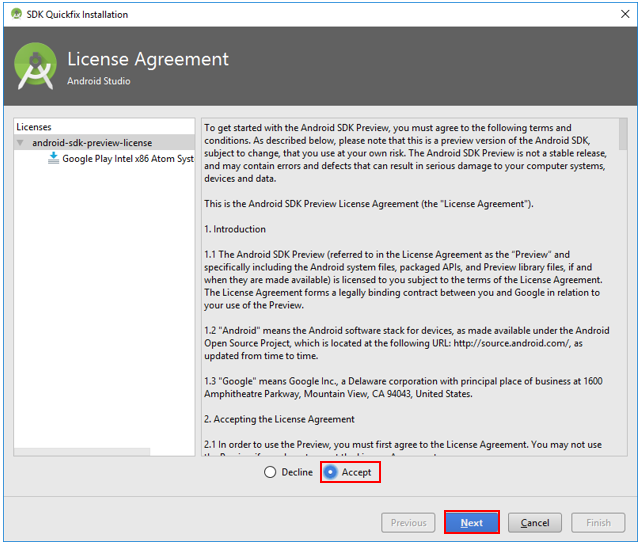
Accept the license agreement and click [Next] if you see this kind of window.
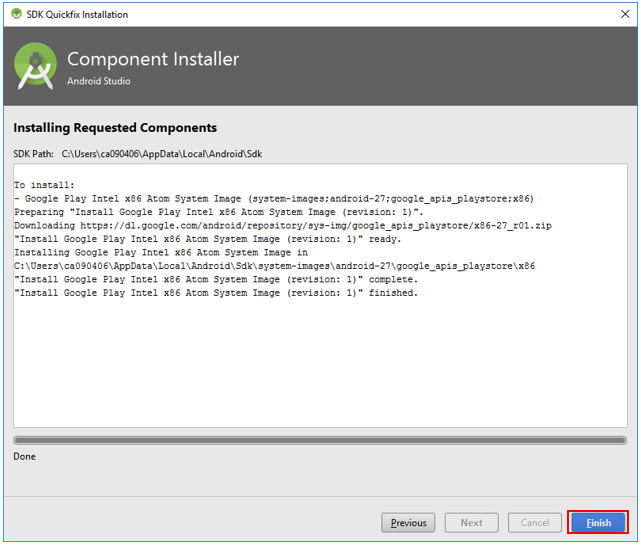
Wait until the download gets completed (this may take a while) and click [Finish] once it is complete.
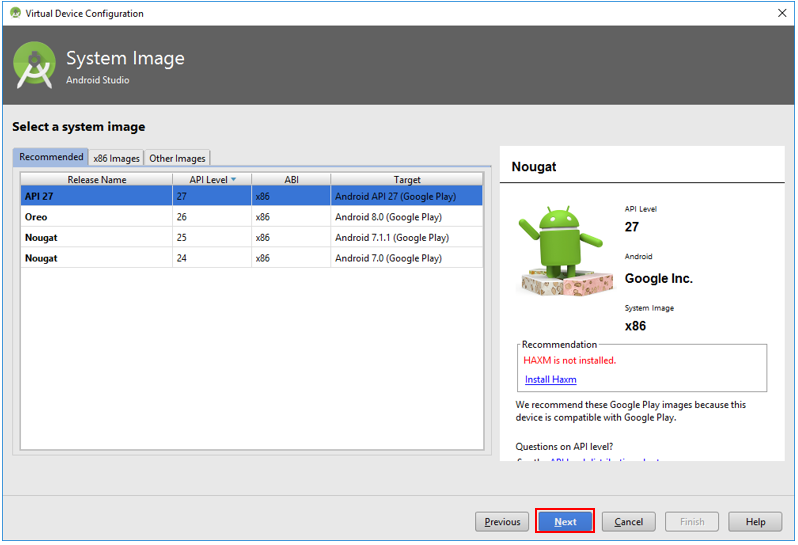
Repeating this procedure, download and install all the components. Once you download everything, you will get the popup on which all the 'donwlink' indication disappeared. (You may need to go through 'Install Haxm', but it doesn't seem that this is required. Install this if you get blocked by missing HAXM at later step). Click [Next]
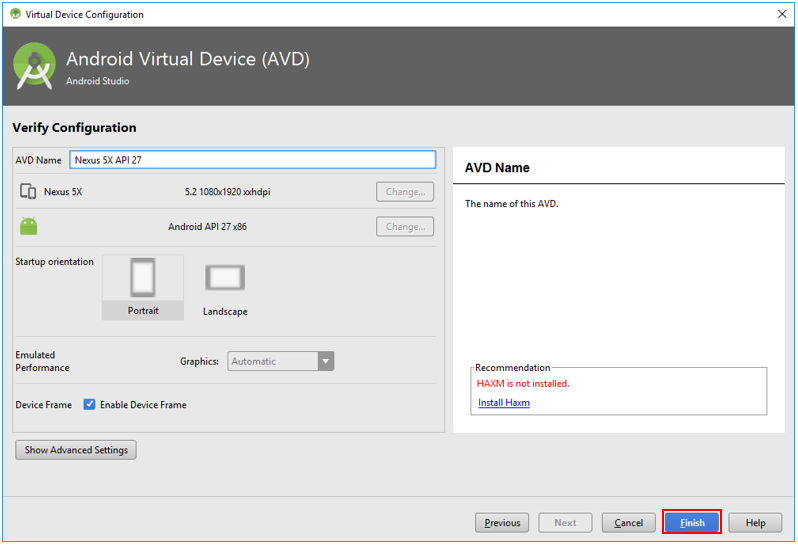
Then specify followings and click [Finish] (I just left everything in default and hit [Finish])
Now you see an virtual device is registered as below. Select the virtual device and click [OK]
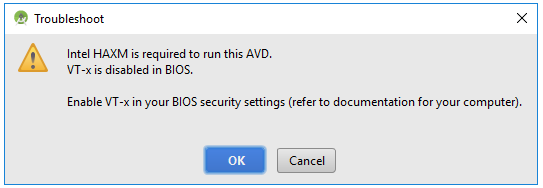
Depending on the PC that you are using, you may get some error message as shown below. This is because your PC BIOS blocks Virtualization. In this case, you need to stop everything here and reboot the PC and get into BIOS setting and enable all the Virtualization functionality. (Refer to Enabling Virtualization in Tip page for the details)
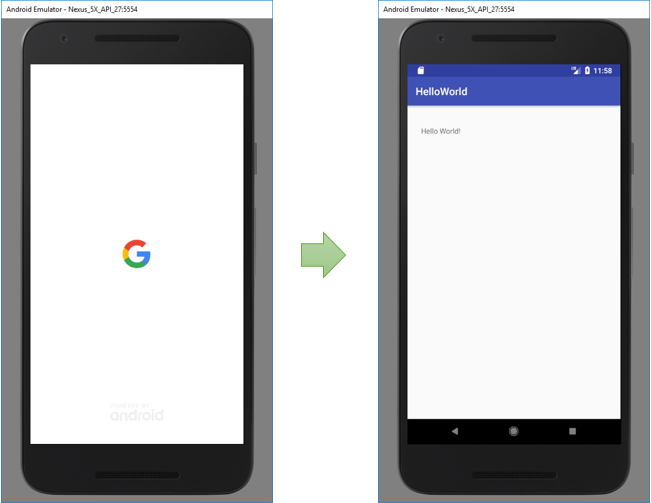
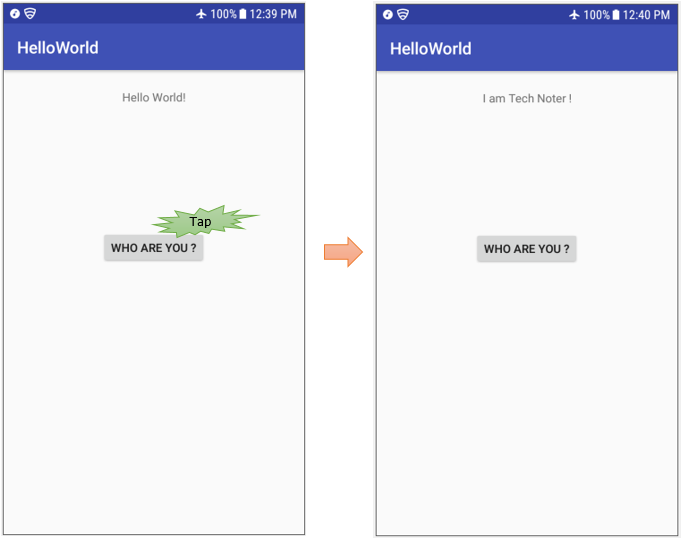
Once you complete the BIOS configuration change, open the project and do [Run App] again. Thne you should get the App running as shown below.
Now let's take a look at how we can run the App on a real device (mobile phone). It is simple if your setting meets the preconditions listed below. A lot of tutorials just assumes that all of these conditions are already met in your system and doesn't mention on this.
< Precondition >
Make it sure that you got all of the following precondition done with your development system.
< Test Procedure >
Same as in the case of Virtual Device execution, execute [Rup 'app'] as shown below.
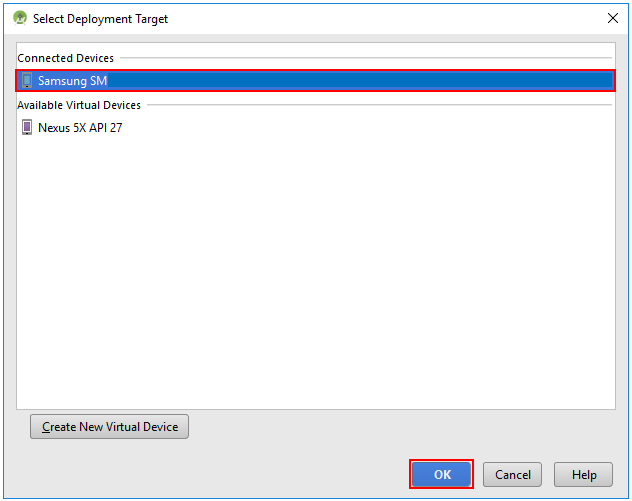
Android Studio will start bulding the project and it will pop up following pop-up when the build gets complete, and click [OK].
Click on [Install and Continue] button as follows. (Installation again ??!!!! ). One good news is that you don't need to this every time you run the app unless you use different device. You only need to do this only once.
After several seconds, you would see the progress bar start moving as below.
Once the installation is done, click on [Finish].
Once installation is done, Android Studio automatically transfer the app to the device and run the app as shown below.
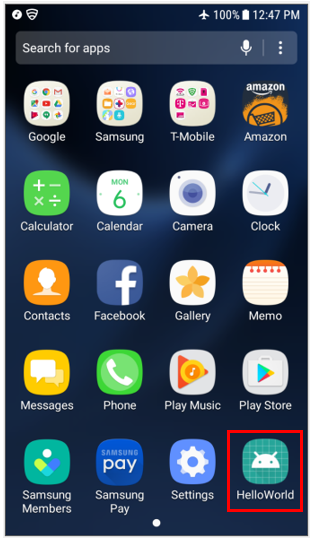
NOTE : Once you run the App from Android Studio, you can find the app in the Application section as shown below.
|
||
