WinSCP
Even though I am interested in Linux in some special cases, I am still Windows person who likes doing things in Windows. However, in some applications (e.g, Embedded System) Linux is more dominant operating system. In that case, many people crerate a remote connection to the system using telnet or ssh. If you just want to run the existing applications in the remote Linux, telnet or ssh would be good enough. However, if you need to write a program, you would find a tedius to do it on Linux unless you are very good at vi editor. For those who are not familiar with vi editor or simply does not like it, it would be good if there is a simple and handy file transfer tool between Windows and the remotely connected Linux. One very convinient tool for this would be WinSCP.
SCP stands for Secure CoPy. It is a tool that transfer files via SSH. (You may do the file transfer using ftp, but it would be more tricky to install and configure ftp server and client).
- Installation
- Step 0 : Check your PC / Operation System Configuration
- Step 1 : Download the Installation Package
- Step 2 : Install the Package
- Connection Setup
- Adding a New Connection
The detailed installation process may vary a little bit depending on version of WinSCP tool. So I would not take every screen capture. I will put down only important steps here for guidance.
Step 0 : Check your PC / Operation System Configuration
When you try to follow instructions and tutorials from various web pages, you would notice that the authors would not provide detailed information on the system configuration that they are using. Largely because of this, sometimes those tutorial would work and sometimes it would not.
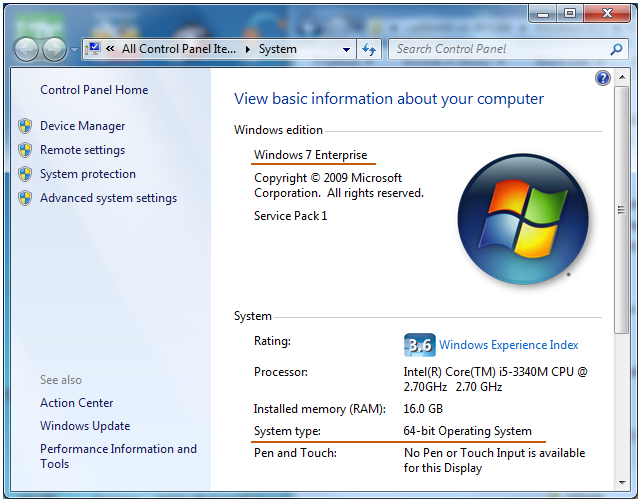
Before I start my tutorial on this page, I want to give you a snapshot on my PC. If you you different configuration (especially different operating system), you may need to download another installation package that fits your hardware and operating system.
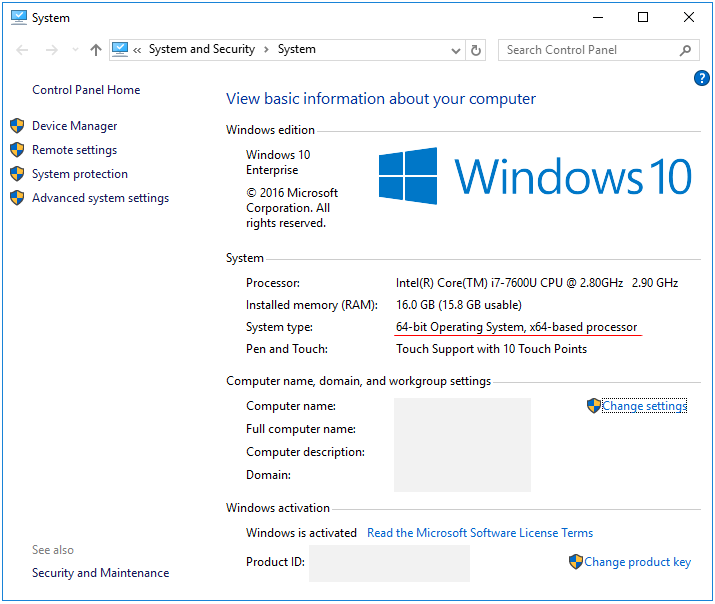
I've also tried with the following system and this tutorial will work with this system as well.
Step 1 : Download the Installation Package
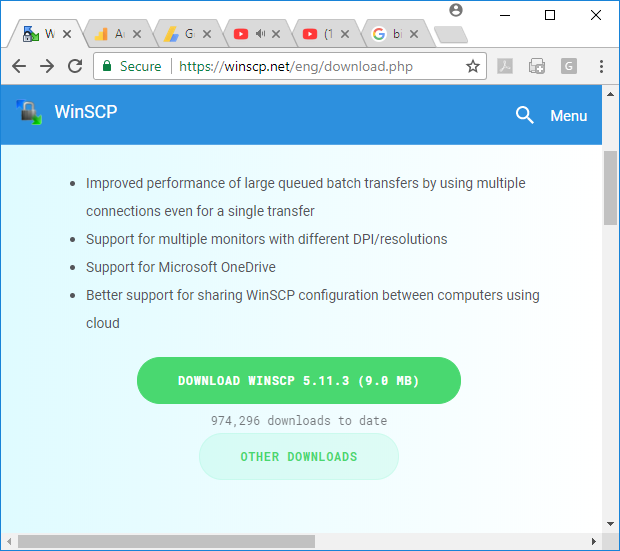
You can download WinSCP from https://winscp.net/eng/download.php If don't find the package at this site when you try to install, try googling WinSCP. (NOTE : This screen is from the page when I tried on Jan 2018).
Step 2 : Install the Package
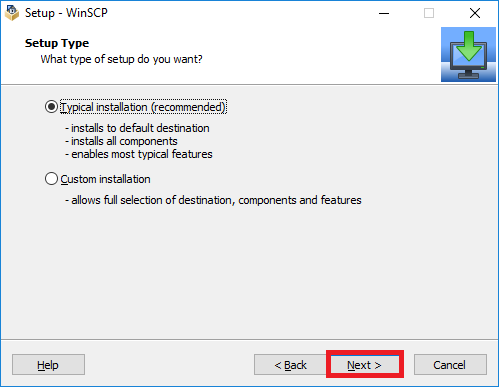
Once you downloaded the installation package, start installing. Depending on the version that you are installing, the installation screen on your screen would be a little bit different from what you see in this page. But you will get some general idea on installation from this page and figure out how to proceed with your version.
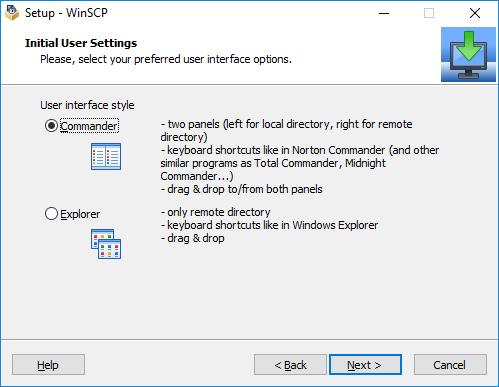
You would get following screen as you progress in installation. In this tutorial, I selected [Commander] option (Actually I tried both type of installation, but [Commander] type were more handy for me) and click [Next].
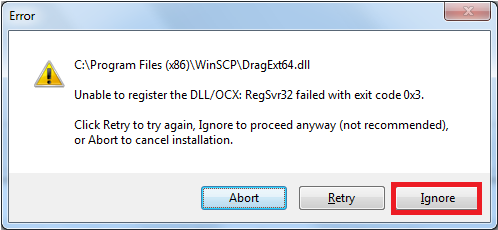
NOTE : You may not have following error, but I got following error when I was installing the package. You may be able to fix this problem by further googling, but I just clicked [Ignore] and luckily installation went on and WinSCP seemed to work without any problem.
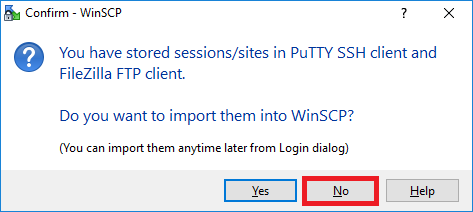
If you have already installed PuTTY SSH and added your own connection there, you may get a window as shown below. If you click [Yes], WinSCP program automatically pull out those connection information and added it to WinSCP connection list. For this tutorial, I clicked [No] to show you WinSCP usage from the very beginning.
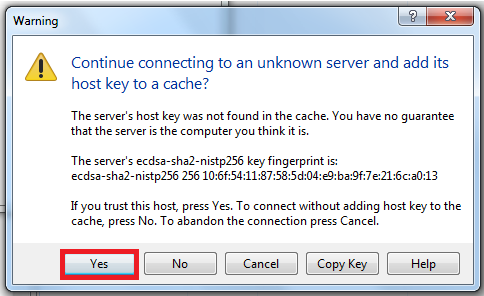
You may have following Warnings as well. In my case, I clicked [Yes] here.
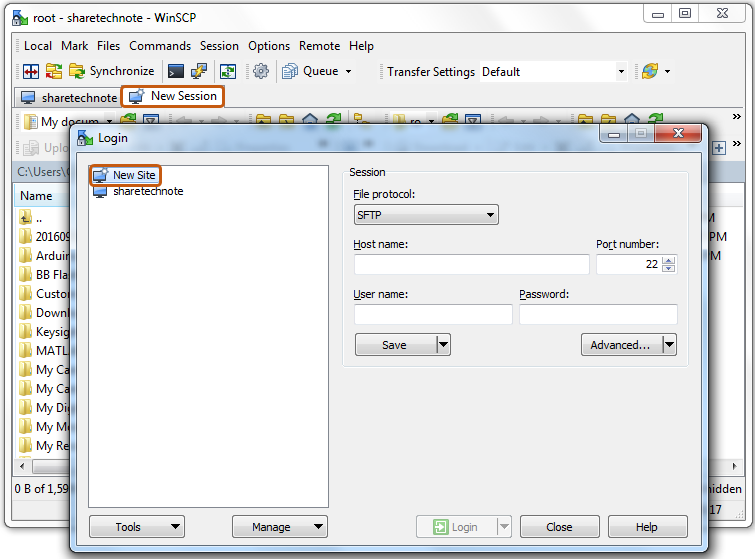
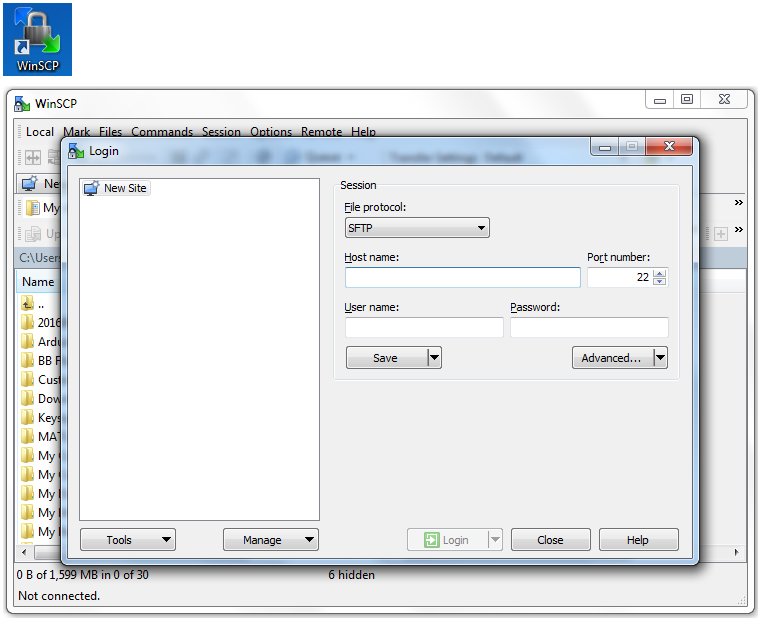
Once you have completed the installation, you would have an icon as shown below. Double click it to launch the program. If there is no existing connection setup, you will have a popup as below.
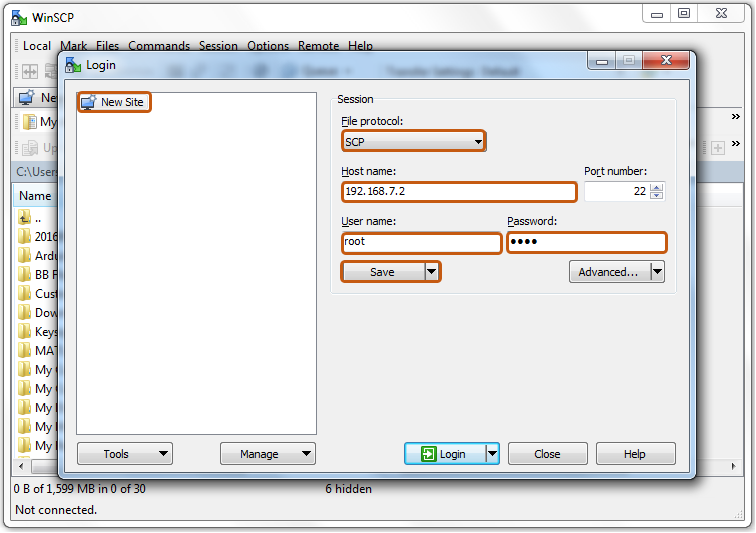
Select the item [New Site] on the left panel and Select Protocol in [File protocol] drop box. I selected "SCP" protcol. And then specify [Host name], [User Name], [Password] as required to log into the remote system and click [Save] button.
As you hit [Save] in previous step, you will have another popu as below.
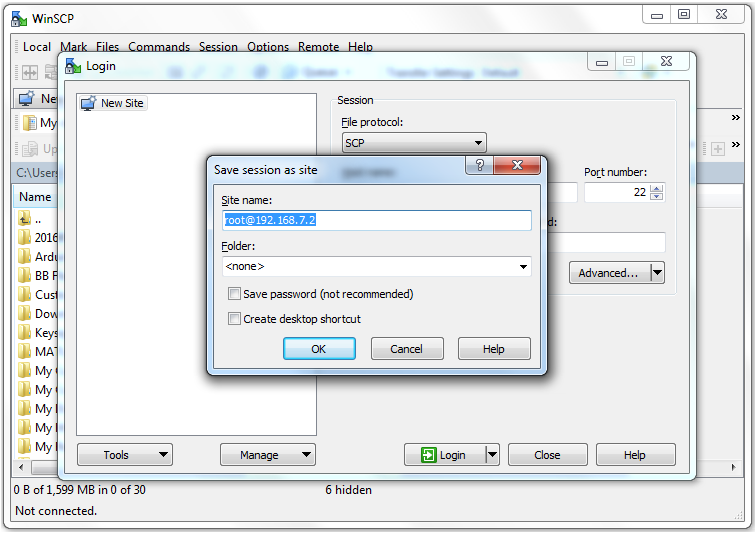
Specify [Site name] (You can specify any name that is easy for you to recognize). And in my case I checked [Save password] even though it says it is "not recommended". It is up to you, but if you don't check this, you will get popup asking for password every time you log into the remote site. However, if you are concerned about security issues for the remote system, don't check [Save password].
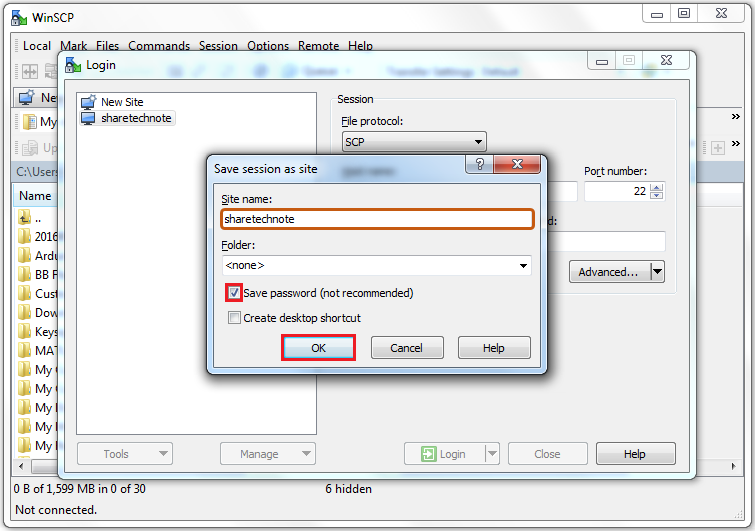
Click [OK] in the above window. You will see new connection added on the left panel as shown below.
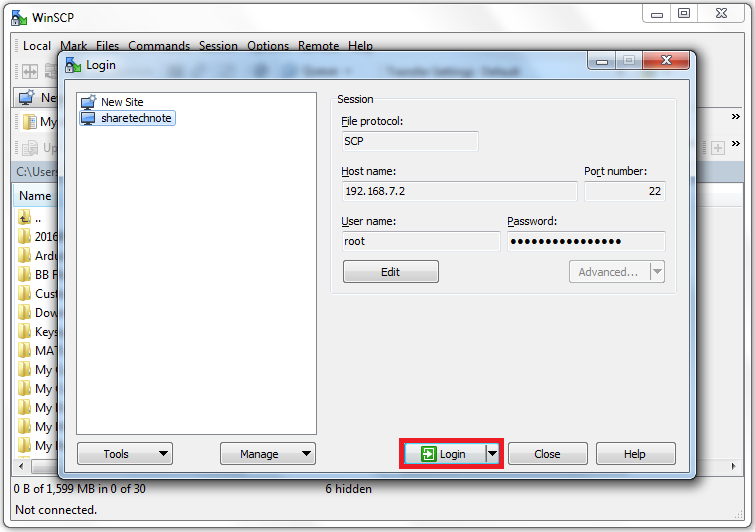
Now click [Login] button and you would get popup as shown below. Just hit [Continue]
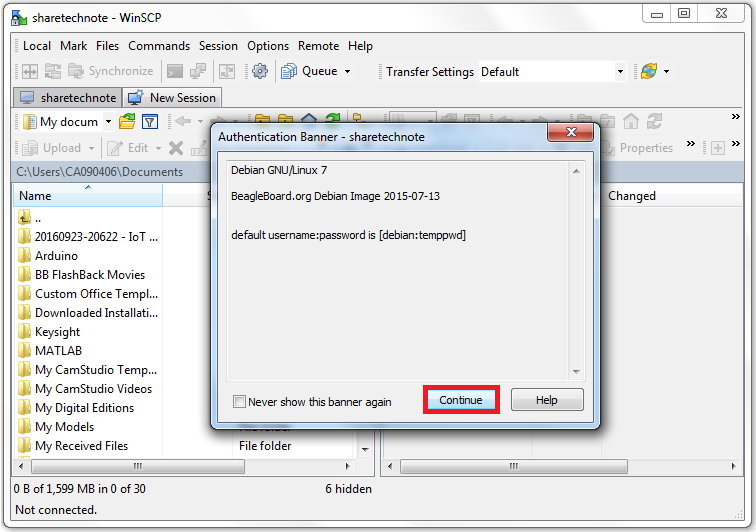
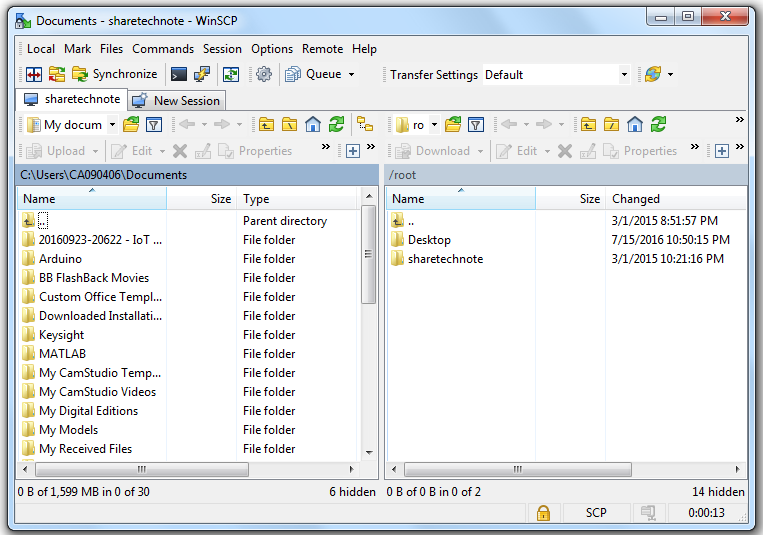
Then, you would get a window like Windows File explorer as shown below.
When you want to connect to other remote system, you can add that system later. It is simple. If you click [New Session] tap, you will get the popup as shown below. The, select the item [New Site] and go through the same procedure you did in previous section.