|
Linux |
||
|
Setting a Bridged Network Interface between Host and Guest
Bridged Network Interface in VirtualBox is a way of physically sharing Network Interface Card(NIC) between Host PC (Windows PC in this case) and Guest PC(Ubuntu in this case). If you are familiar with OSI 7 layer and understand the fact that 'Bridge' is a L2 device, you would easily guess the meaning of 'Bridged Interface'. In this mode, Virtual Box gets direct access to MAC layer traffic (i.e, Ethernet Flow) in NIC.
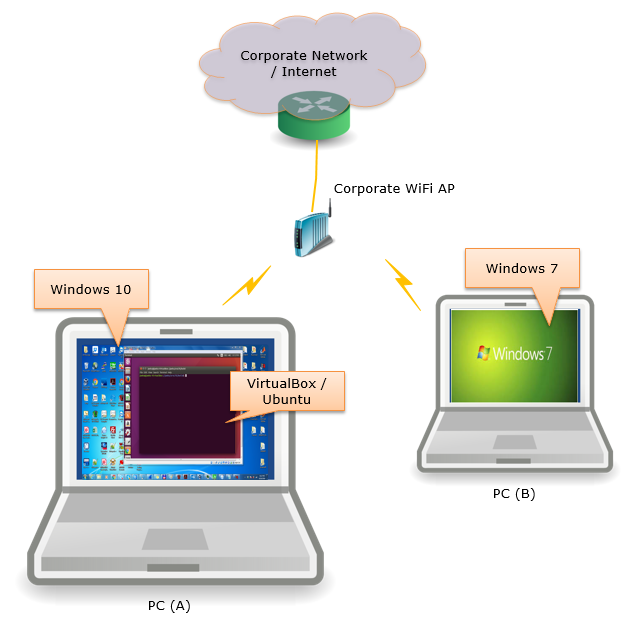
The test setup that I used for this tutorial is as follows. I think this is one of the most common configuration that you are using your network in daily life. Even your home network will have this kind of structure. So I think you can duplicate what I did without much difficulties.
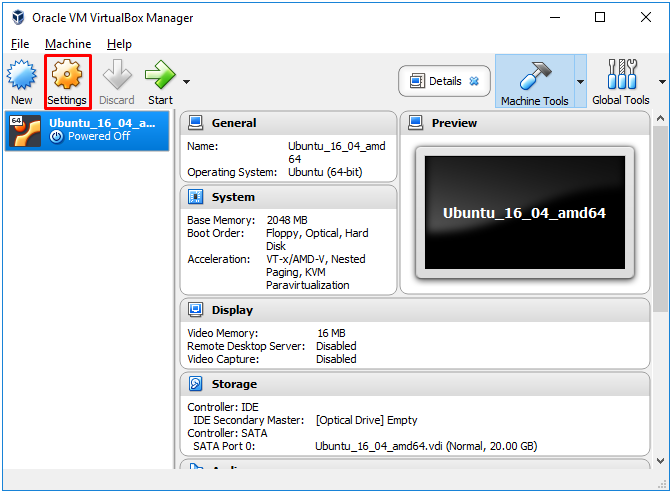
Click on [Settings] button as shown below .
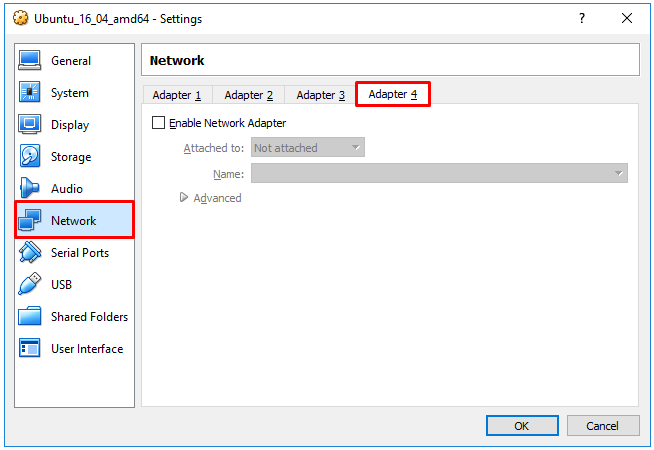
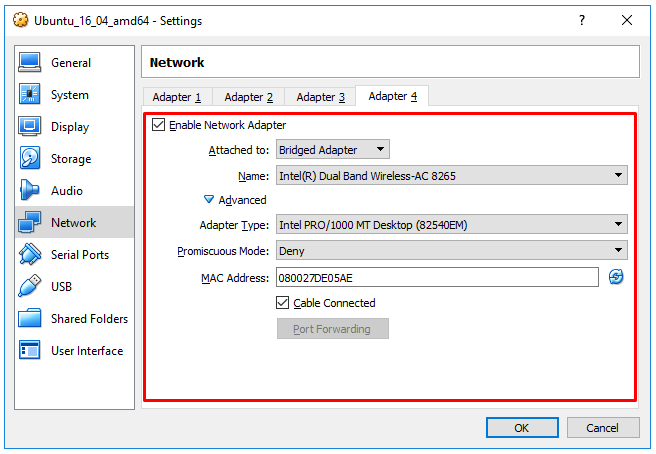
Select [Network] at the left pannel and select any adaptor that are not being used. (In my case, Adapter 1,2,3 are already being used, so I selected Adapter 4).
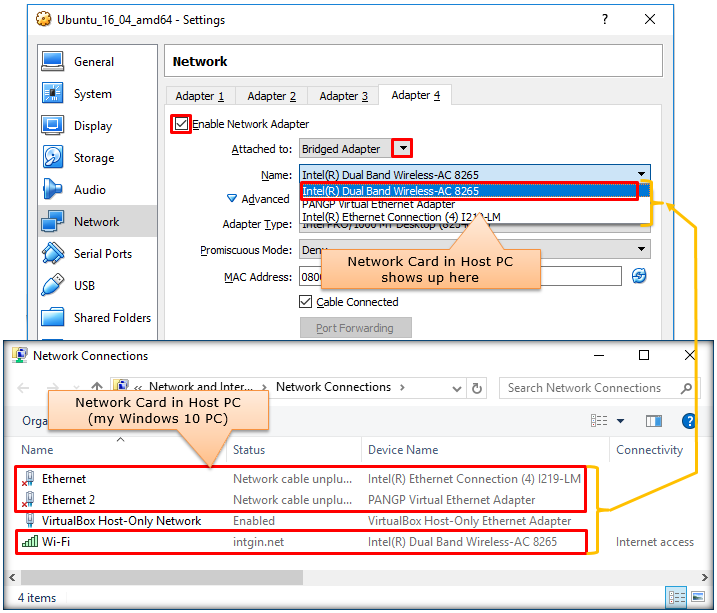
Then Check [Enable Network Adapter]. Then drop down [Attached to] box. Then you will see the list of Network Interface Cards (NIC) installed in your PC as shown below. You may have different NIC and get different list from what you see below.
Then configure the other parts as shown below and click [OK].
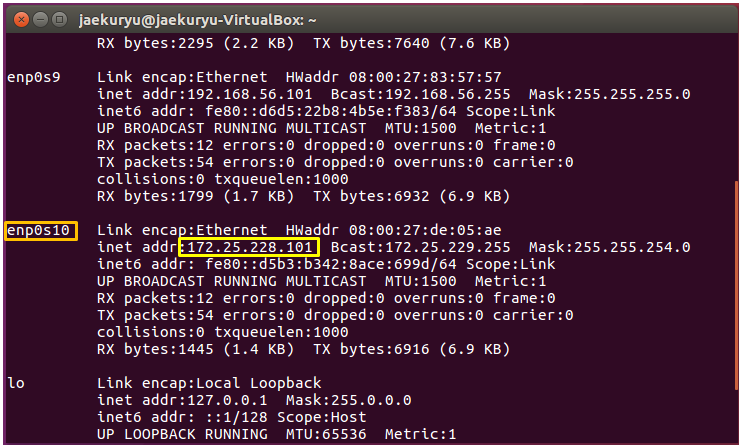
Now do ifconfig in your Virtual PC (Ubuntu). In my case, I got as follows.
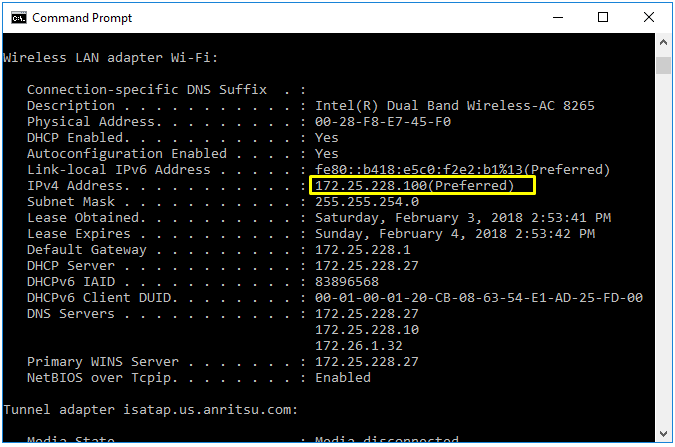
Following is the NIC configuration on Host PC (Windows 10 in my case). This NIC is the one shared by the Virtual PC.
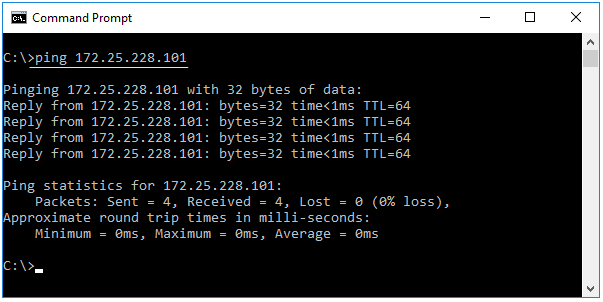
Now let's try ping from Host PC (Windows 10 PC in my case) to Virtual PC (Ubuntu in VirtualBox) and see if it works. In my case, it worked as follows.
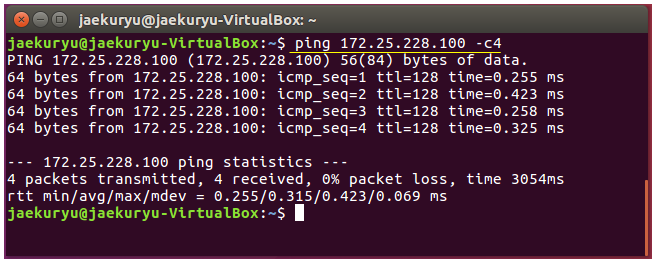
Now let's try ping from Virtual PC (Ubuntu in VirtualBox) to Host PC (Windows 10 PC in my case) and see if it works. In my case, it worked as follows.
As a final check, try ping from another PC (PC (B) in my case) to Virtual PC. If it successfully works, you will get the result as follows.
After I completed this step, I installed open-ssh server on my virtual PC (Ubuntu) and then establish SFTP connection between the host PC (Windows PC) and Virtual PC using WinSCP. Then I was able to transfer files back and forth very easily.
|
||