Connect To PC
This page is for the procedure to boot up Raspberry Pi with the SD Card that you prepared in Burn OS SD Card page. I assume that you have completed every steps described in Burn OS SD Card. If you are going to connect a Monitor directly to Raspberry Pi, you would not need to go through the procedure described in Enable SSH, Enable ICS on Laptop and Figuring out IP address of Raspberry Pi section. These two sections are to connect your Windows laptop to the Raspberry Pi without using any external Monitor.
You may esasily install or enable SSH if you already booted up the OS, but this is before you boot up the operating system. You would need a special trick to enable SSH directly to OS SD itself. This is how you can do it.
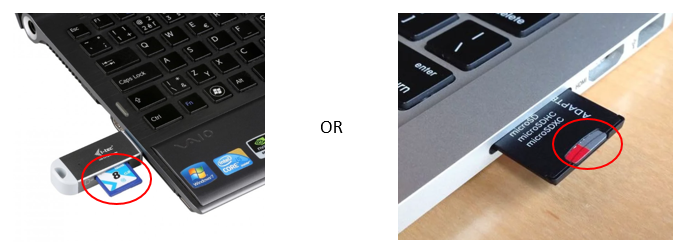
First, make it sure that the OS SD card is inserted in your Windows Laptop as shown below.
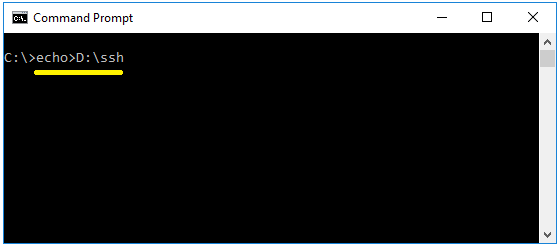
Open a Command Prompt Window and run a command as shown below (This assums that the driver for the SD card on your laptop is set to be 'D'. If your SD card is mapped to different drive, change the following command accordingly).
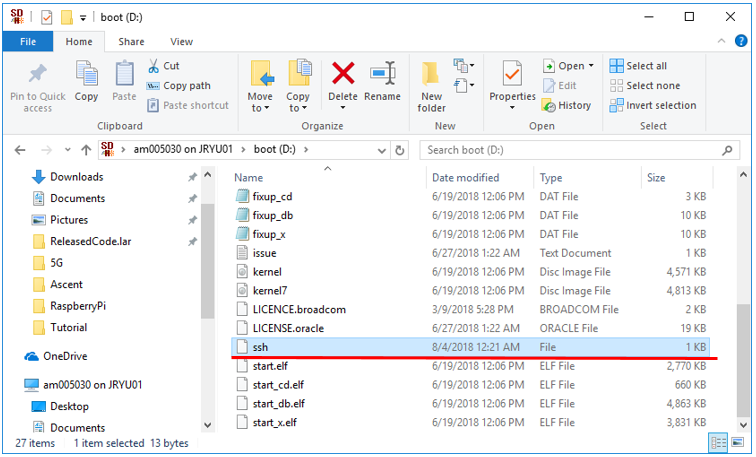
Then you will see a file named 'ssh' is created in the root directory of the SD Card as shown below.
Now you need some way to assign an IP to Raspberry Pi before the Raspberry Pi is connected to your laptop. The IP of Raspberry Pi should be in the same subnet in order to connect it to your laptop.
Raspberry Pi is trying to get an IP using DHCP whenever it boots up. You need to have a DHCP server and configue it to assign the IP to the Raspberry Pi which is in the same subnet as your laptop. There are many ways to do this but one of the simplest way would be to setup ICS and let the Raspberry Pi to get an IP from the same DHCP server as your laptop. This is how you can do it.
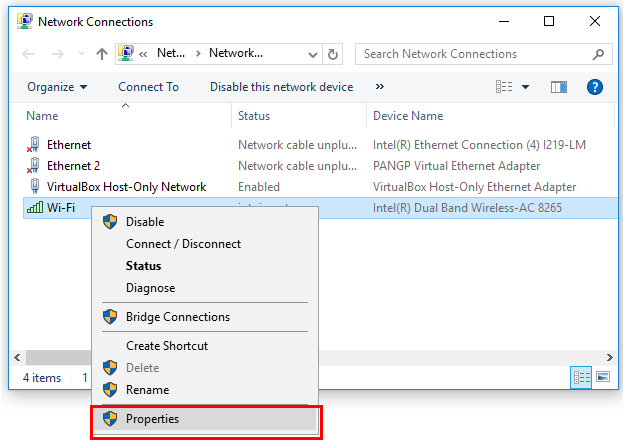
In my case, I will be sharing my WiFi that is connected to my mobile phone via Mobile Hotspot. You can use other network card if it is connected to any router supporting DHCP.
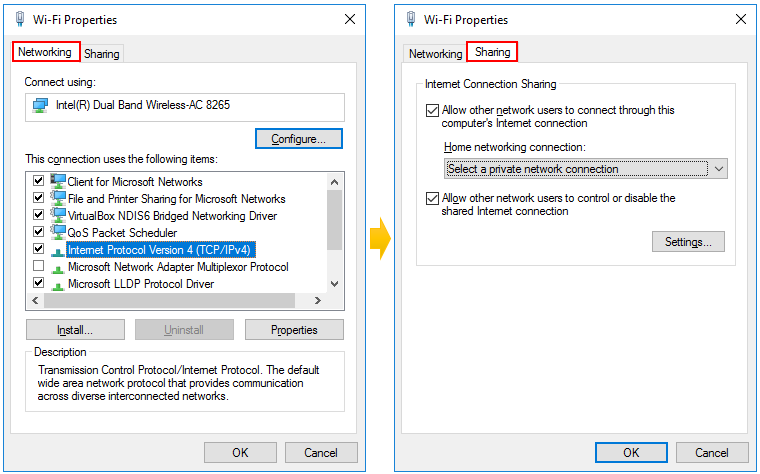
Open Properties window for the WiFi as shown below.
Select Internet Protocol Version 4 and move to [Sharing] Tab.
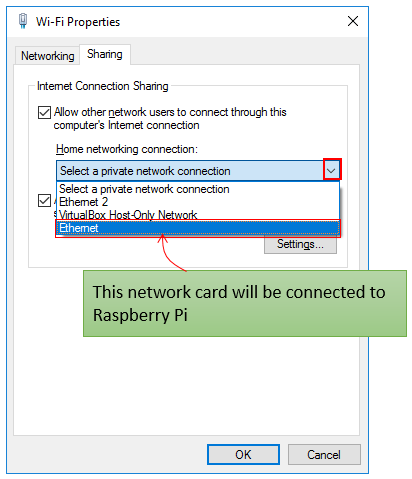
Make it sure that you select the Network card name that will be connected to Raspberry Pi later.
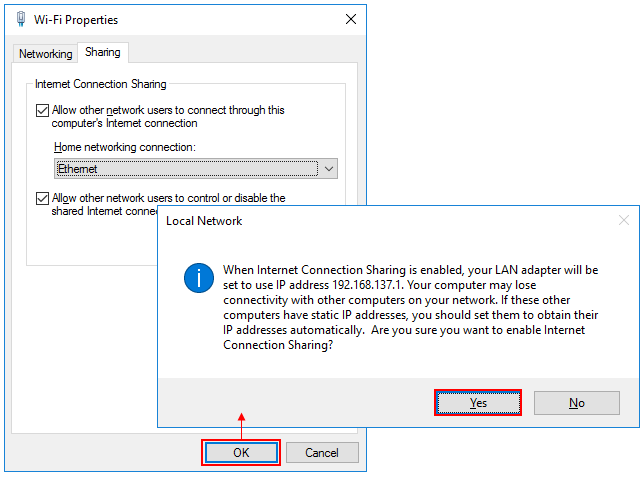
If you press OK on Property window, you will get a popup as below, Press [Yes] on the popup. (NOTE : The popup says that the Network Interface Card shared to the WiFi would get the IP 192.168.137.1)
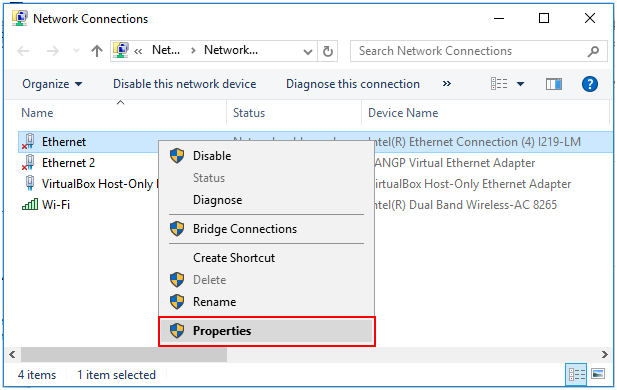
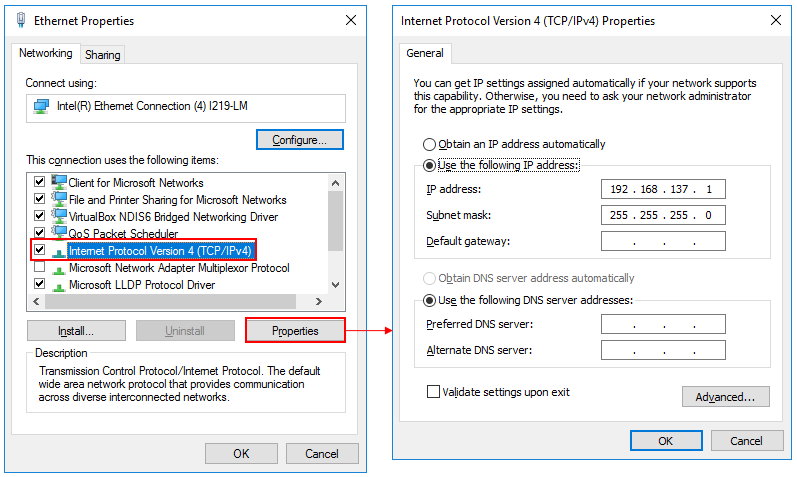
Now you can confirm that the Network Informace Card shared with WiFi is assigned to be 192.168.137.1 in following way.
Open the Property window for the ethernet card.
You can confirm that the Network Card is assigned with the IP 192.168.137.1 as shown below.
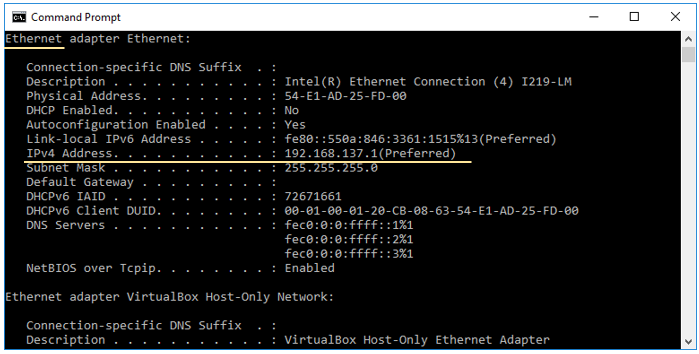
Another way to confirm the assigned IP is to use 'ipcofing -all' in Windows command prompt as shown below.
Bootup and Connection to Laptop
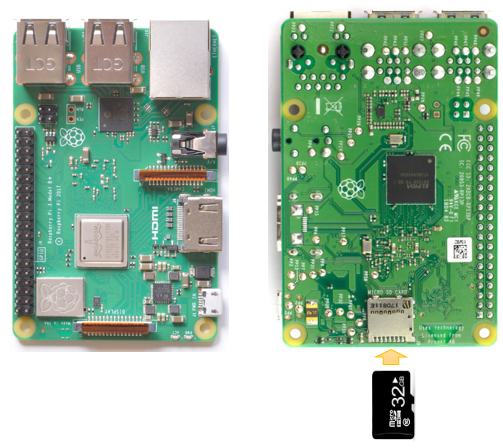
Now plug the SD card into Raspberry Pi SD card slot as shown below.
Connect a ethernet port on Raspberry Pi to the ethernet port on your laptop, and then plug in the power adaptor to Raspberry Pi and turn it on.
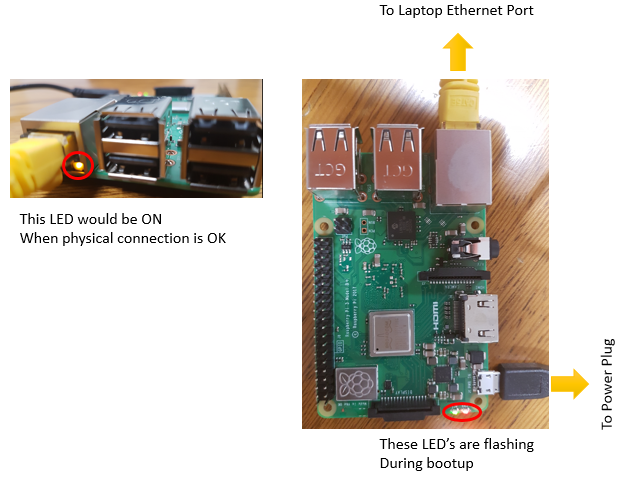
Wait for about a minute to get the Pi completely booted before you move to next step.
Figuring out IP address of Raspberry Pi
By completing the previous section, Raspberry Pi might have been assigned an IP from the DHCP server. But the problem is that you don't which IP is assigned.
How to figure out which IP is assigned to the Raspberry Pi ? I saw many people use IP Scanning tool to figure out the IP, but it didn't work for me (probably IP scanning is blocked by Raspberry Pi OS that I used). So I used rather primitive way (but working) as shown here.
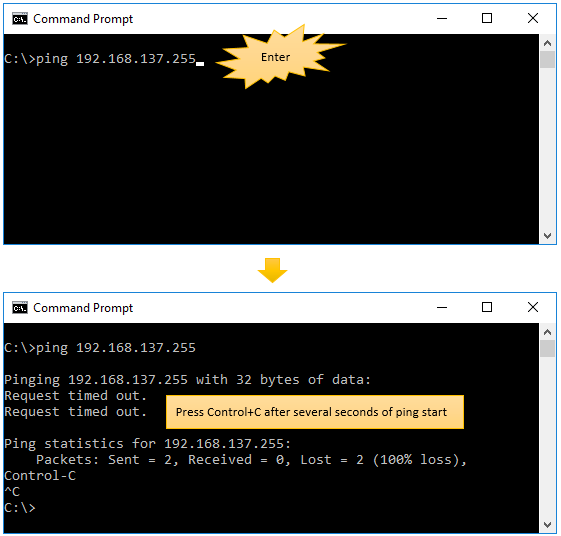
Run ping to broadcasting IP and stop the ping after several seconds.
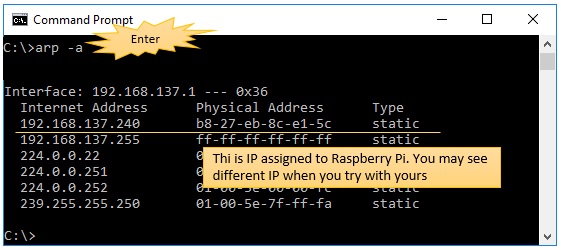
Now print out ARP table using following command. The IP 192.168.137.xxx (other than 192.168.137.255) would be the IP assigned to the Raspberry IP. (If you have tried this process several times before, you may see several different IP in the format of 192.168.137.xxx. In this case, you need to use your logic to find which one is the right IP. In my case, I remove the IP from the arp table after I figure out the IP assigned to Raspberry Pi in order to avoid the confusion).
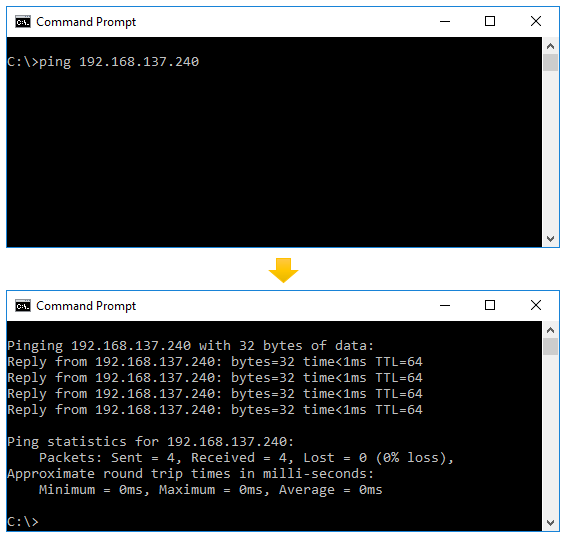
Once you figure out the IP, try ping to see if it is really working.
Connecting to Raspberry Pi with SSH
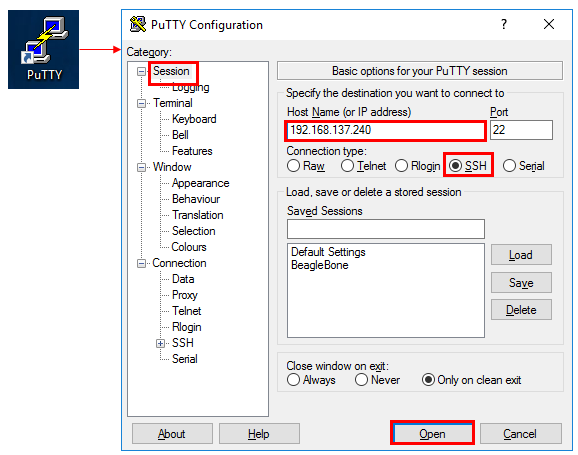
Once you figure out the IP assigned to Raspberry Pi, you can connect to it over SSH. You can use the famous PuTTY tool as shown below. (NOTE : You have to change the IP address to the one that is assigned to your Raspberry Pi. Don't just blindly copy the IP shown here)
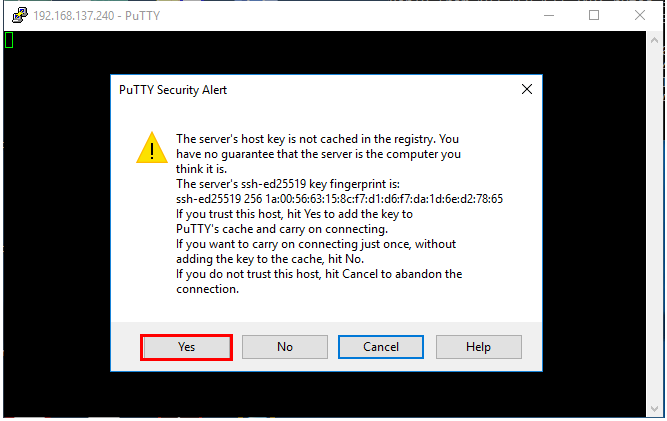
If SSH is properly activated on Raspberry Pi, you will get following Popup. Press [Yes]
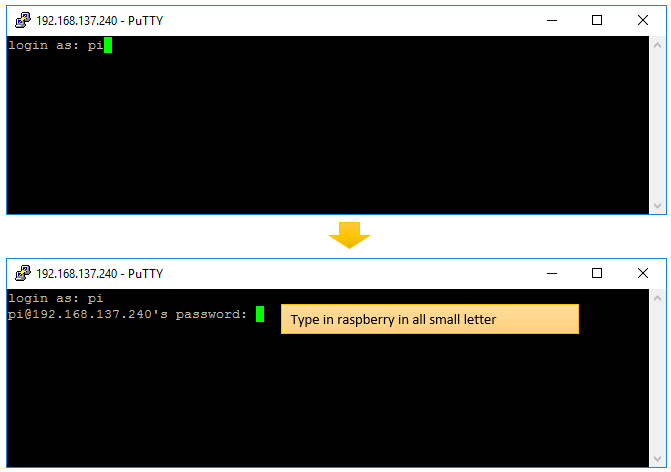
Type in 'pi' as login ID and type in 'raspberrypi' as password (raspberrypi is the default password. If you change this password, you need to type in the changed password when you log in next time).
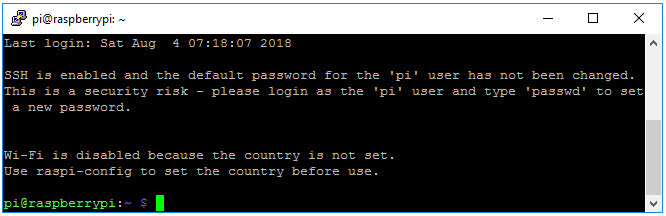
If log in is successful, you will get the command prompt as shown below.
Assigning a permanent IP to Raspberry Pi
You may think the process you have gone through in this page is too complicated and tedius. You may try this once or twice but would not like to do this every time you boot up Raspberry Pi.
To avoid the repetition of this tedius process, I would recommend to assign a permanent IP to the Pi. You can assign a permanent IP to the Pi as described here.
Getting connected to Raspberry Pi with GUI
Once you get the IP of the Raspberry Pi, you can connect to it in GUI using TightVNC.
Reference :
[1]